
Continuing with the instructional blog posts, I have decided to show you all a step by step guide to making a spreader. Why a spreader you ask? Because I want to give you all a project that requires as few tools as possible.
What You’ll Need:
-

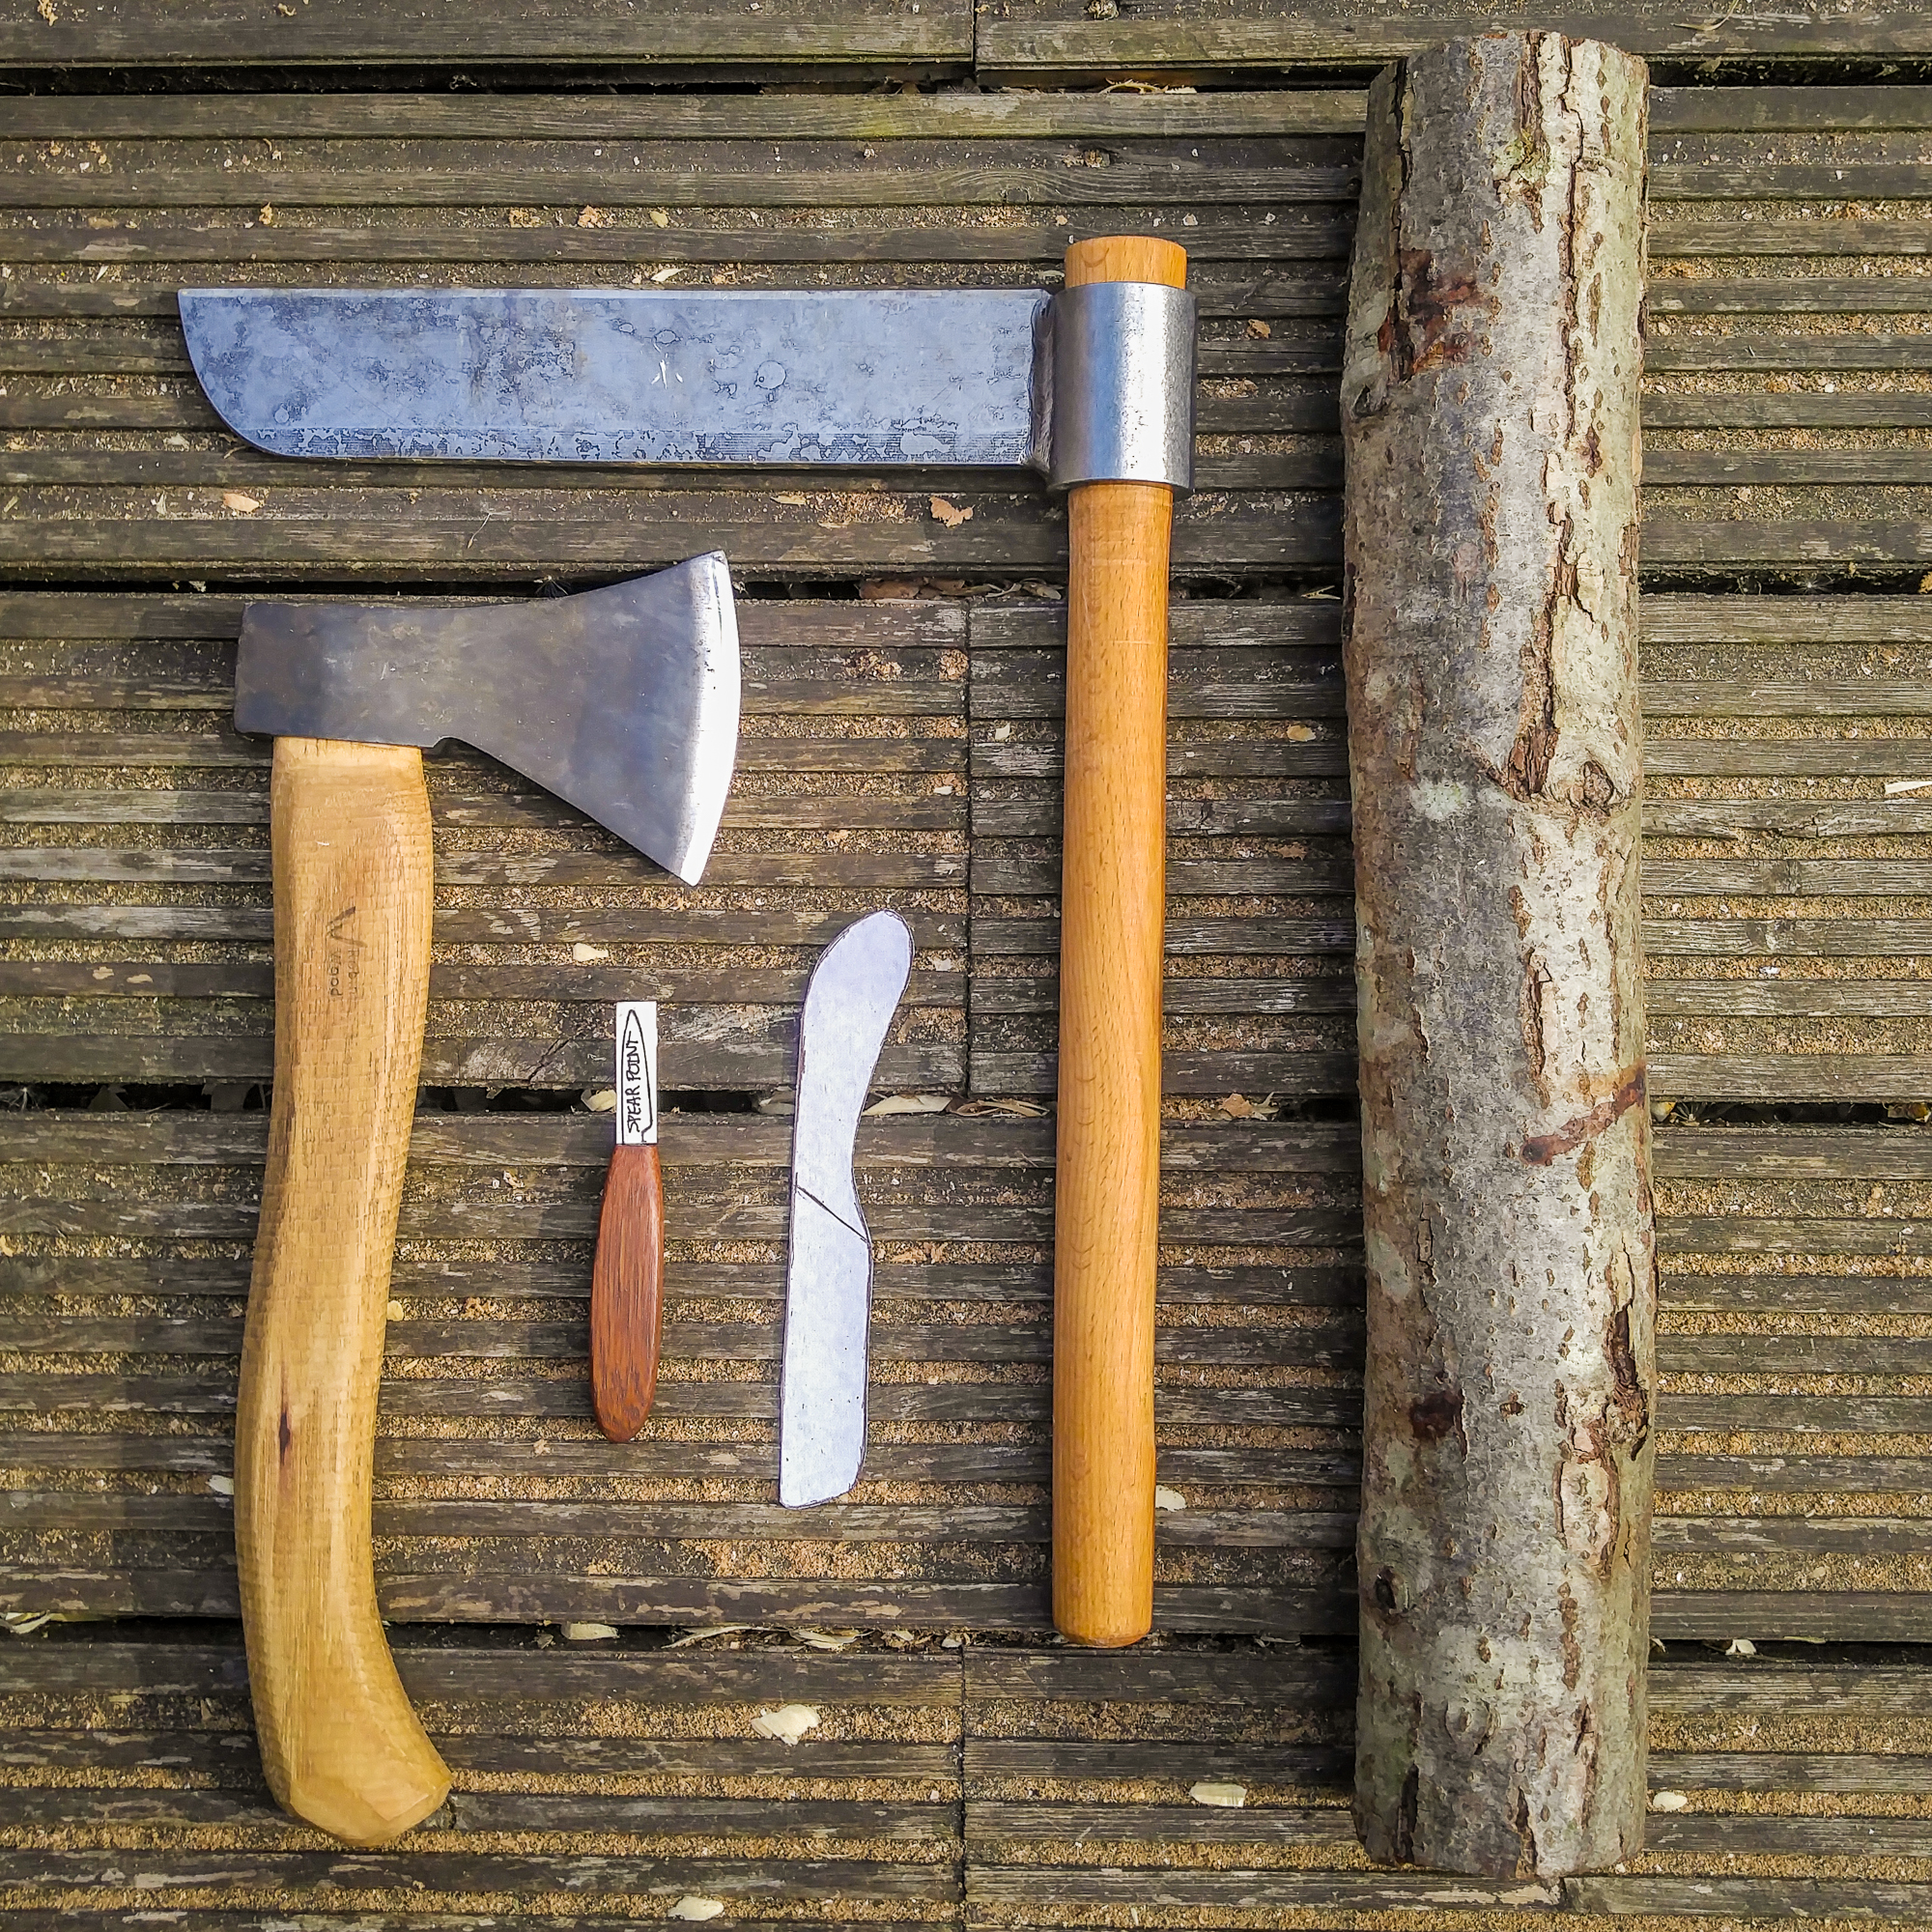
Gather your supplies. (Left to right: axe, knife, template, froe, wood.) Wood
- I always use fresh (or green) wood, but you can use any store bought wood for this project.
- If you are using fresh wood, you don’t need a huge log, something 2-3 inches in diameter and about 8 inches long will do.
- If you are using store bought wood, again you don’t need much, something 8 inches long, 3 inches wide and about 1.5 inches thick should be plenty. The smaller the piece of wood (as long as it’s not too small!) the less you have to remove.
- I always use fresh (or green) wood, but you can use any store bought wood for this project.
- A Knife
- Even a utility knife will work.
- Saw
- Just raid the garage, I’m sure you will find one there.
- Pencil
- For drawing a template.
Those are the only required tools; however, I use a few extras. If you have any of these, I will show you how and when I use them during this project:
- Axe
- For chopping away bigger chunks than what you can with the knife.
- Froe
- For splitting the fresh wood log (if you are using fresh wood). The axe also works well for splitting the wood; however, I use the froe just to help prolong my axe’s life.
- Cardboard
- For making a template.
- Sandpaper
- For if you want to sand the final project (I do). If not, then you won’t need this.
- Food safe oil
- This is for the end result; it protects the wood from use.

Do you have everything you need? Are you ready to start? I am…well I was, by the time you’re reading this my spreader has long been made, but let’s imagine it wasn’t, I want this to be something we can do together. Grab your tools and your wood and let’s begin.
Step 1
If working with fresh wood, you will need to use either a froe or an axe (I used my froe for this) to split the log down the middle. If you are using fresh wood and don’t have either of those tools, with a lot of perseverance, you can saw the log in half. The log needs to be split through what is called the “piff” which is the very small darker circle in the middle of the wood.
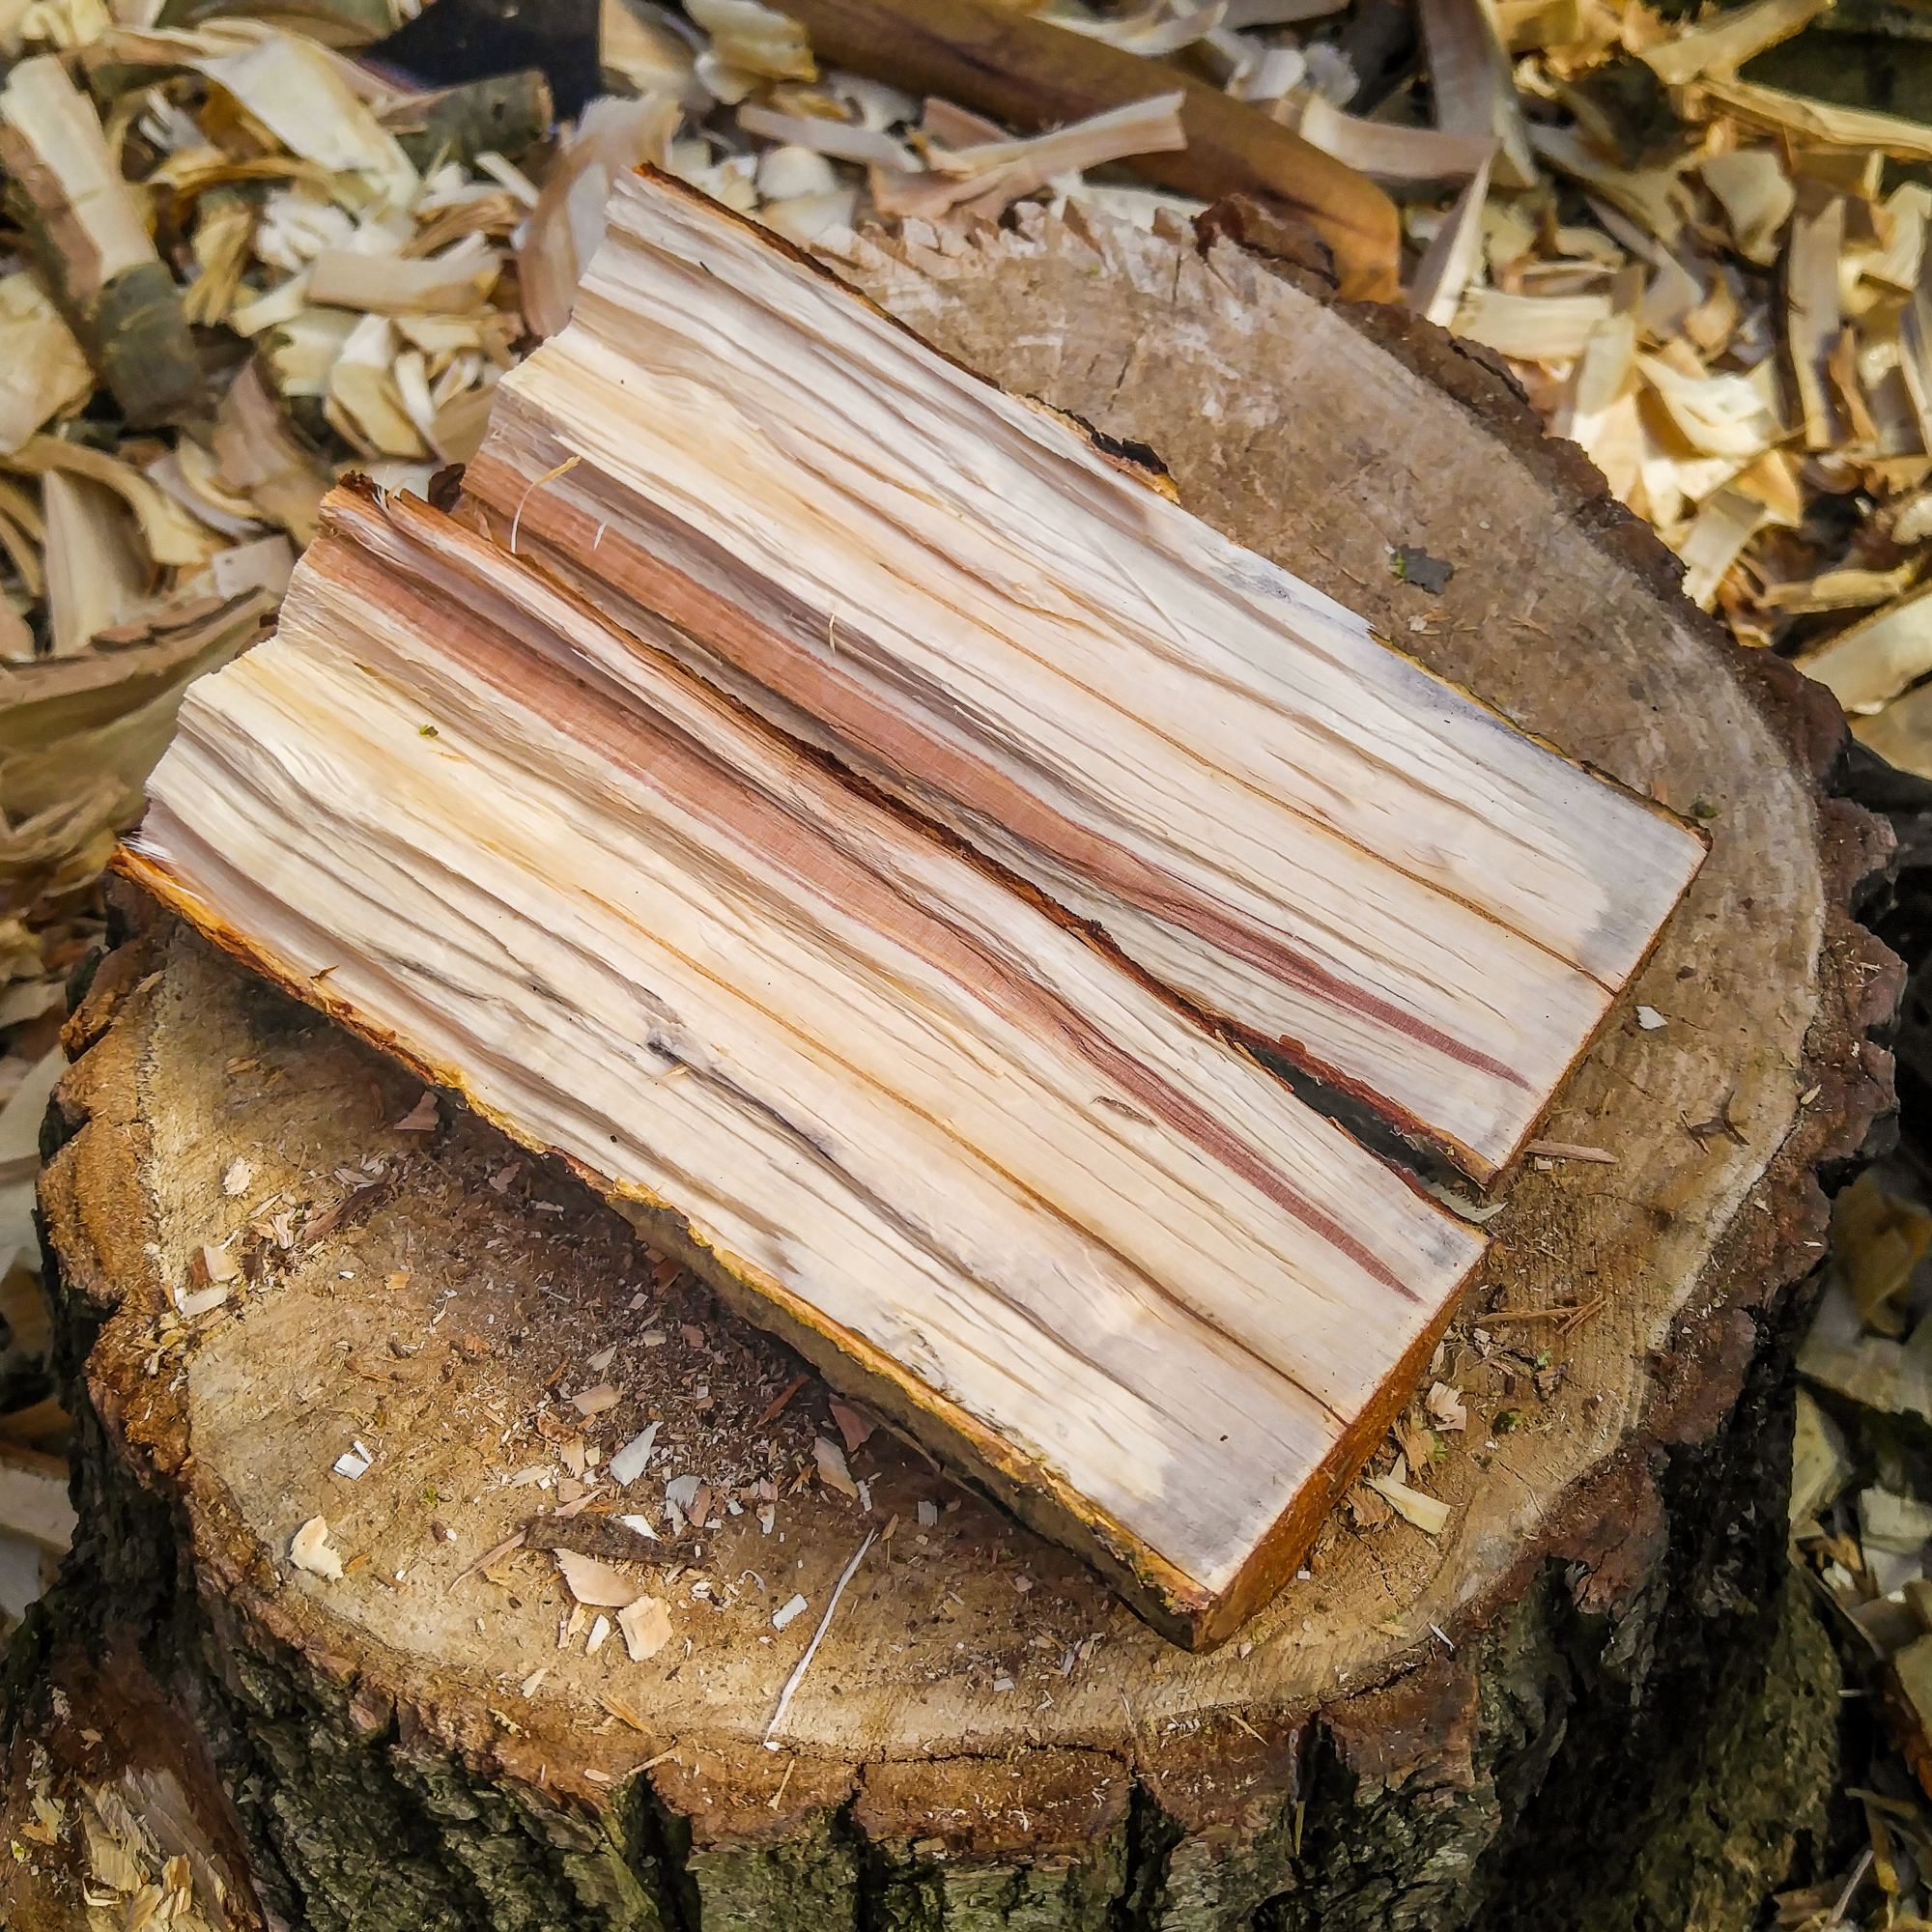
If you are using store bought wood, you can skip this step.
Step 2
Once you have split the wood and have two halves, choose the half you want to work with. Look for the piece that looks the least twisted and has the fewest knots in it; this will make for a more enjoyable experience. Again, if you are using store bought wood you can skip this step.
Step 3
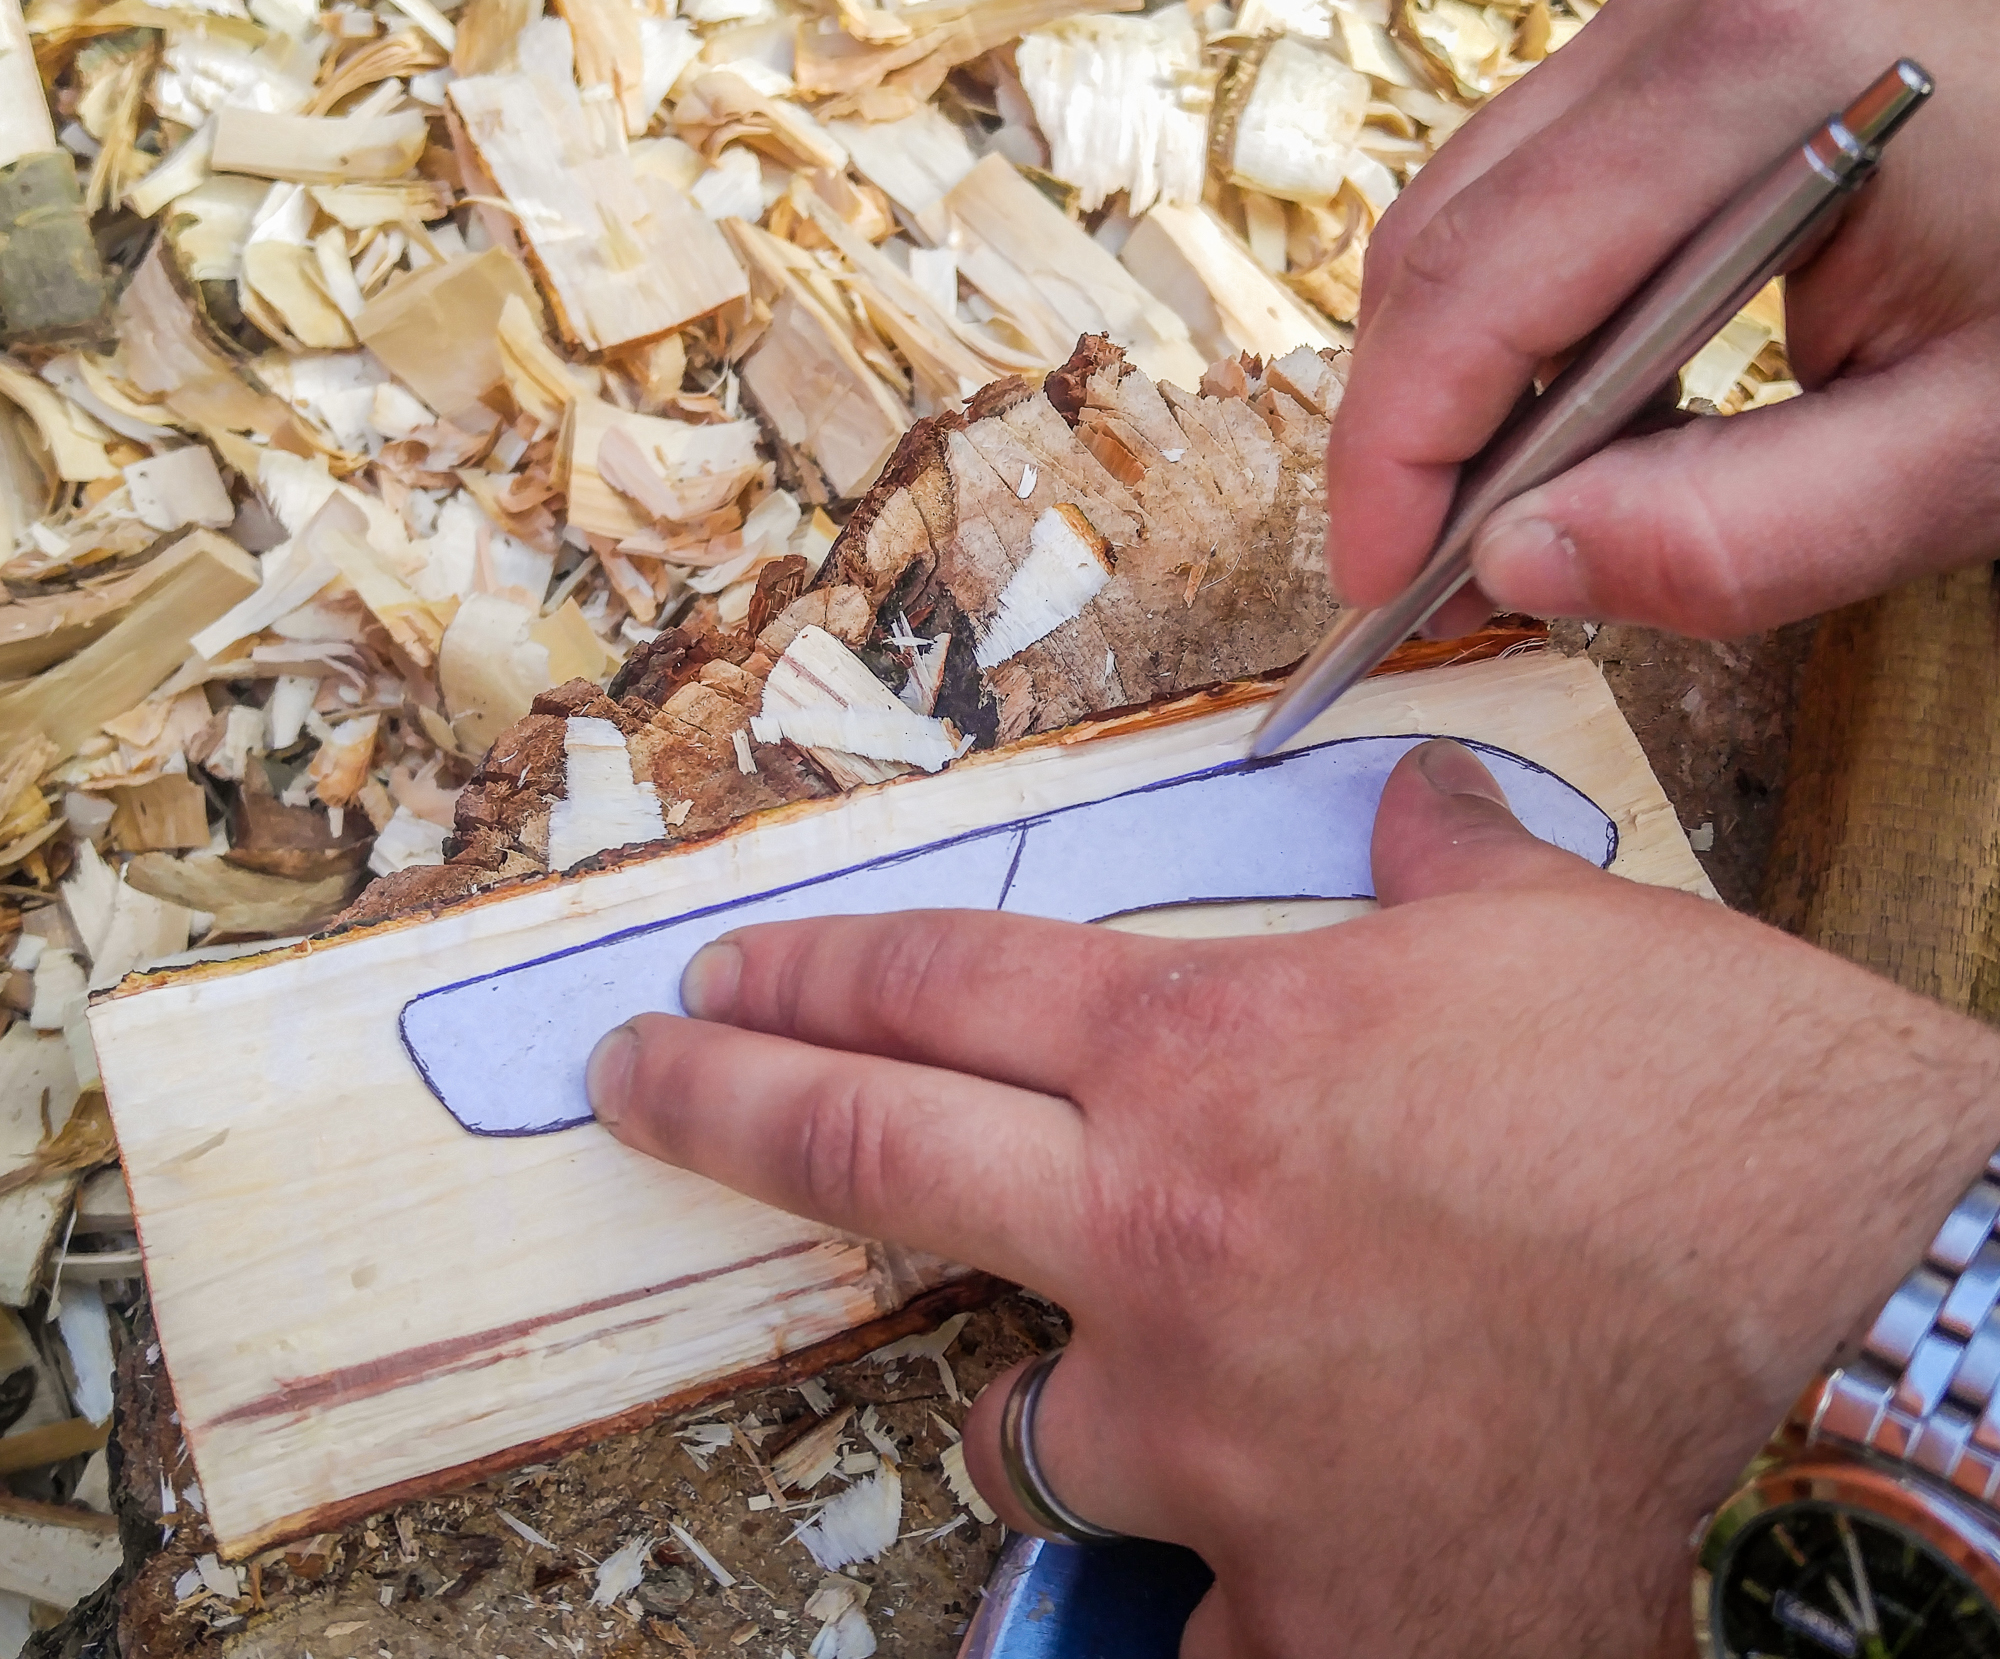
Finally, those with store bought wood can join the process. Start by drawing out your spreader, either on a piece of cardboard, or free hand onto the wood. Here I have chosen to draw onto cardboard, which will allow me to repeat this size and shape over and over.
Step 4
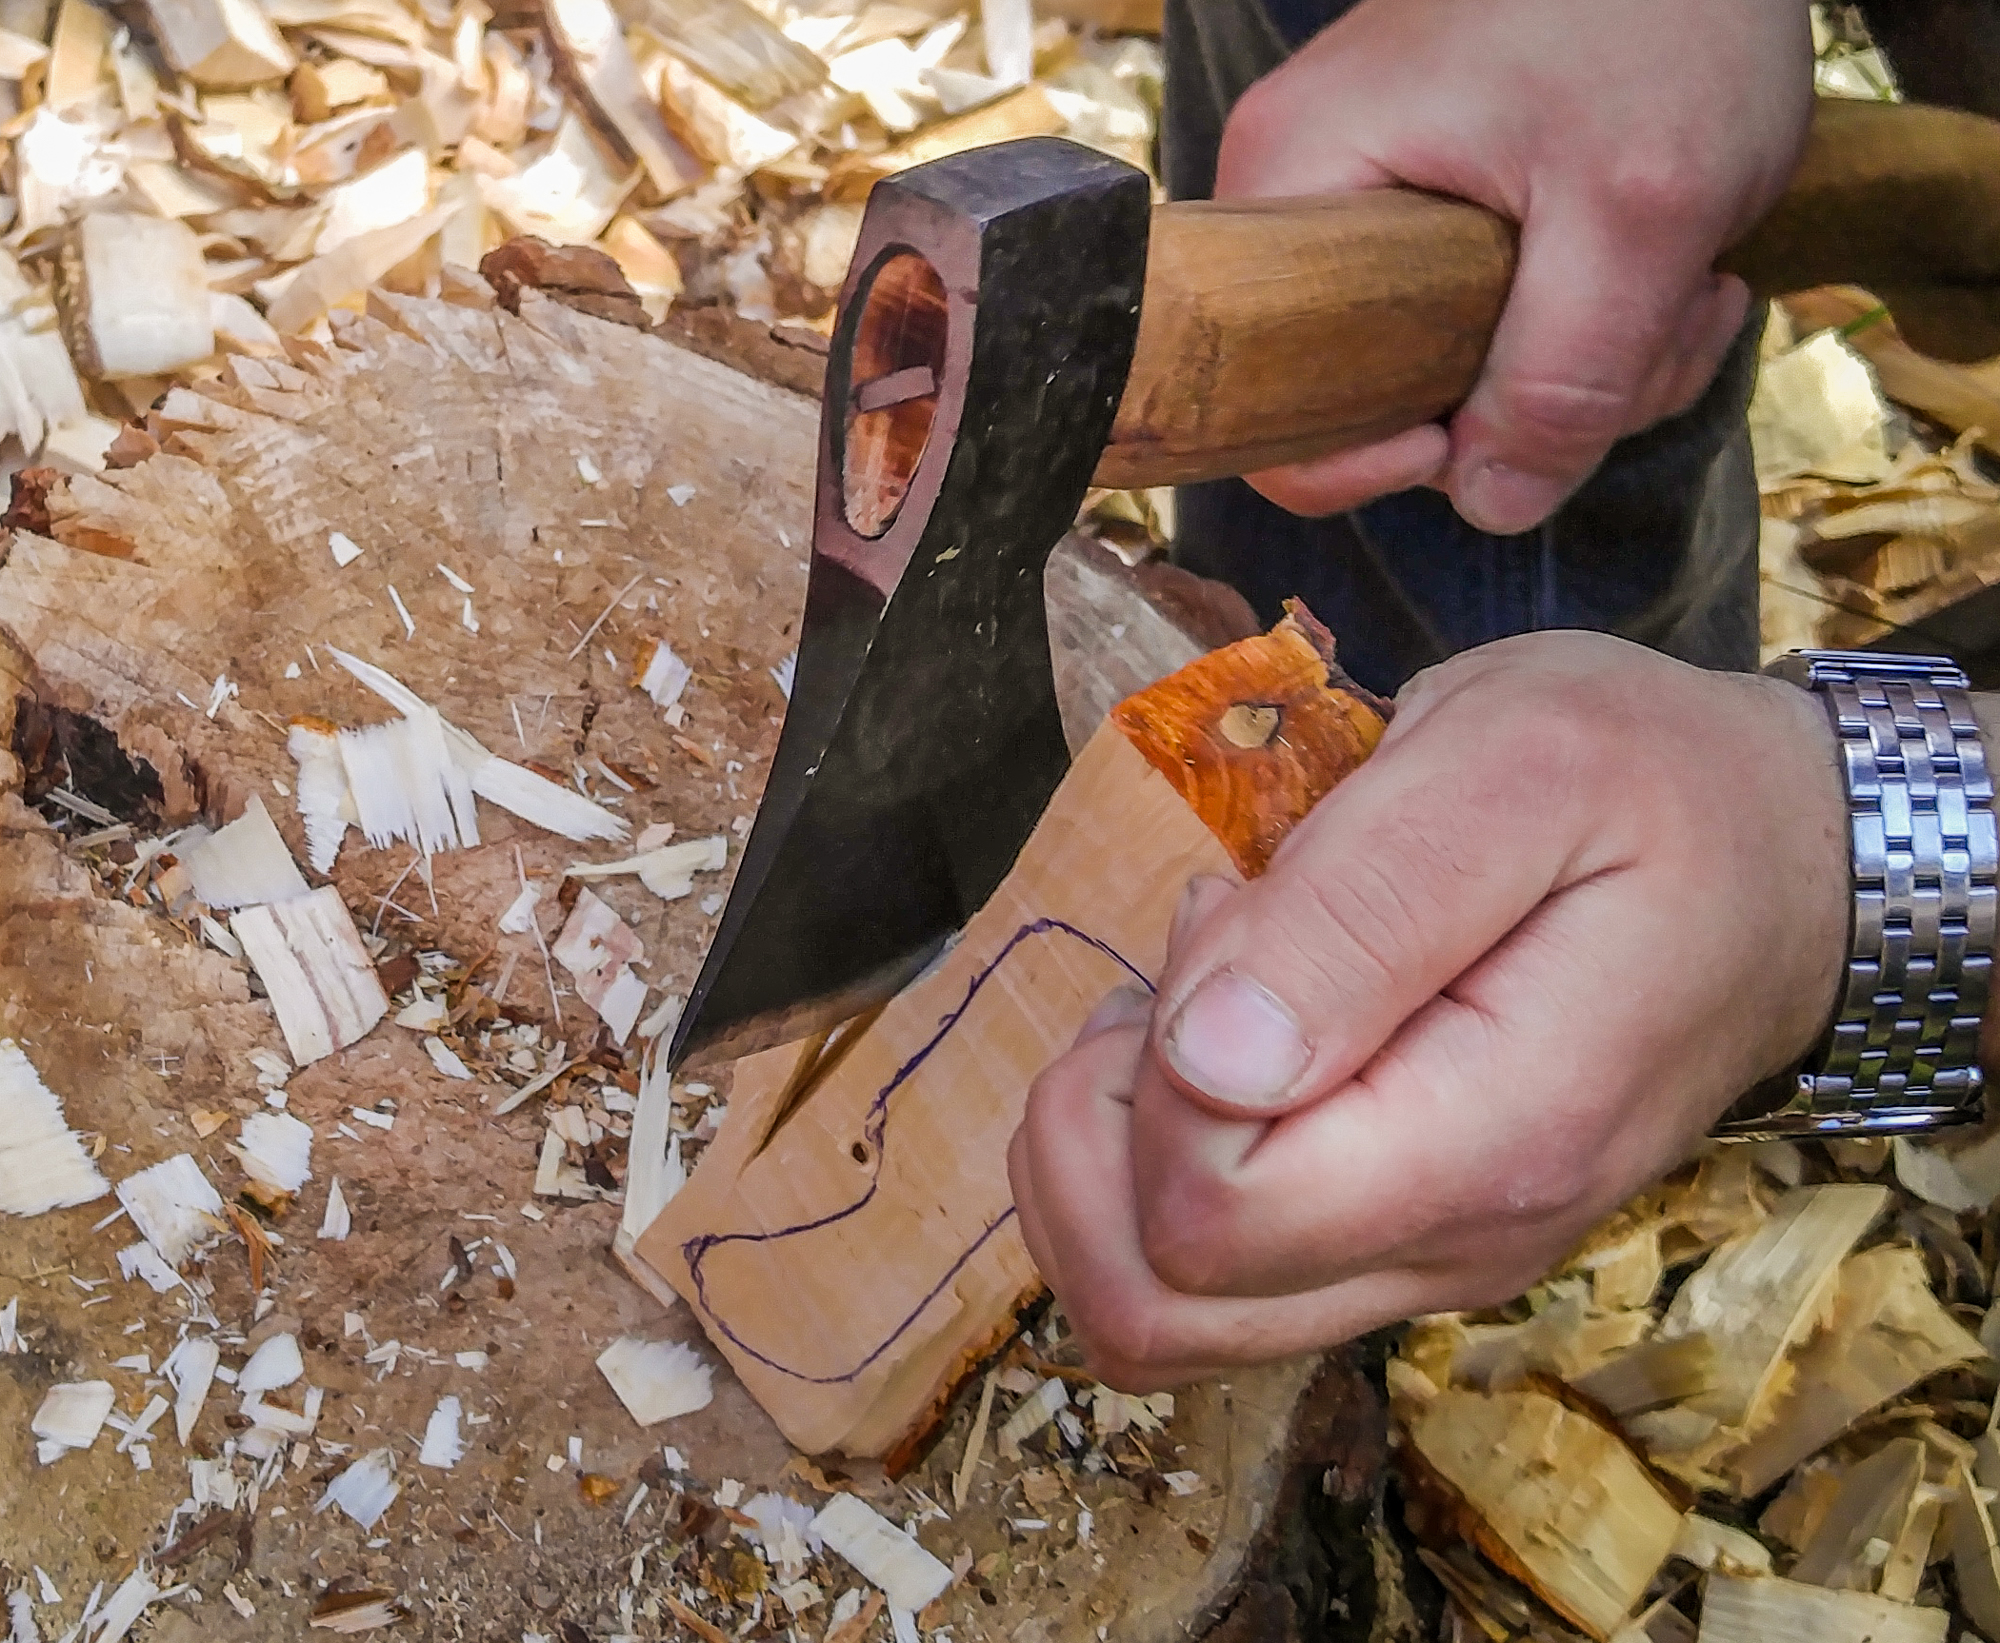
Let’s get chopping! Use your axe to start chopping away as much of the wood as you can, get as close to the lines of your spreader as you feel comfortable in doing.
If you don’t have an axe, again, you can use a saw to take away as much material as you can. But let’s be real…axing is ten times more fun.
Step 5
Are you happy with how it looks so far? Then let’s move to the knife, it’s time to start whittling. This isn’t much of a step, but more of a time to tell you a few things… this is a blog after all.
This has always been and probably always will be my favourite part of the process. I usually plug in my headphones and listen to music or a sermon and just carve away. If I can give one strong piece of advice, I would say that you need to make sure you are continually looking over your piece to make sure you haven’t gone astray.
Step 6
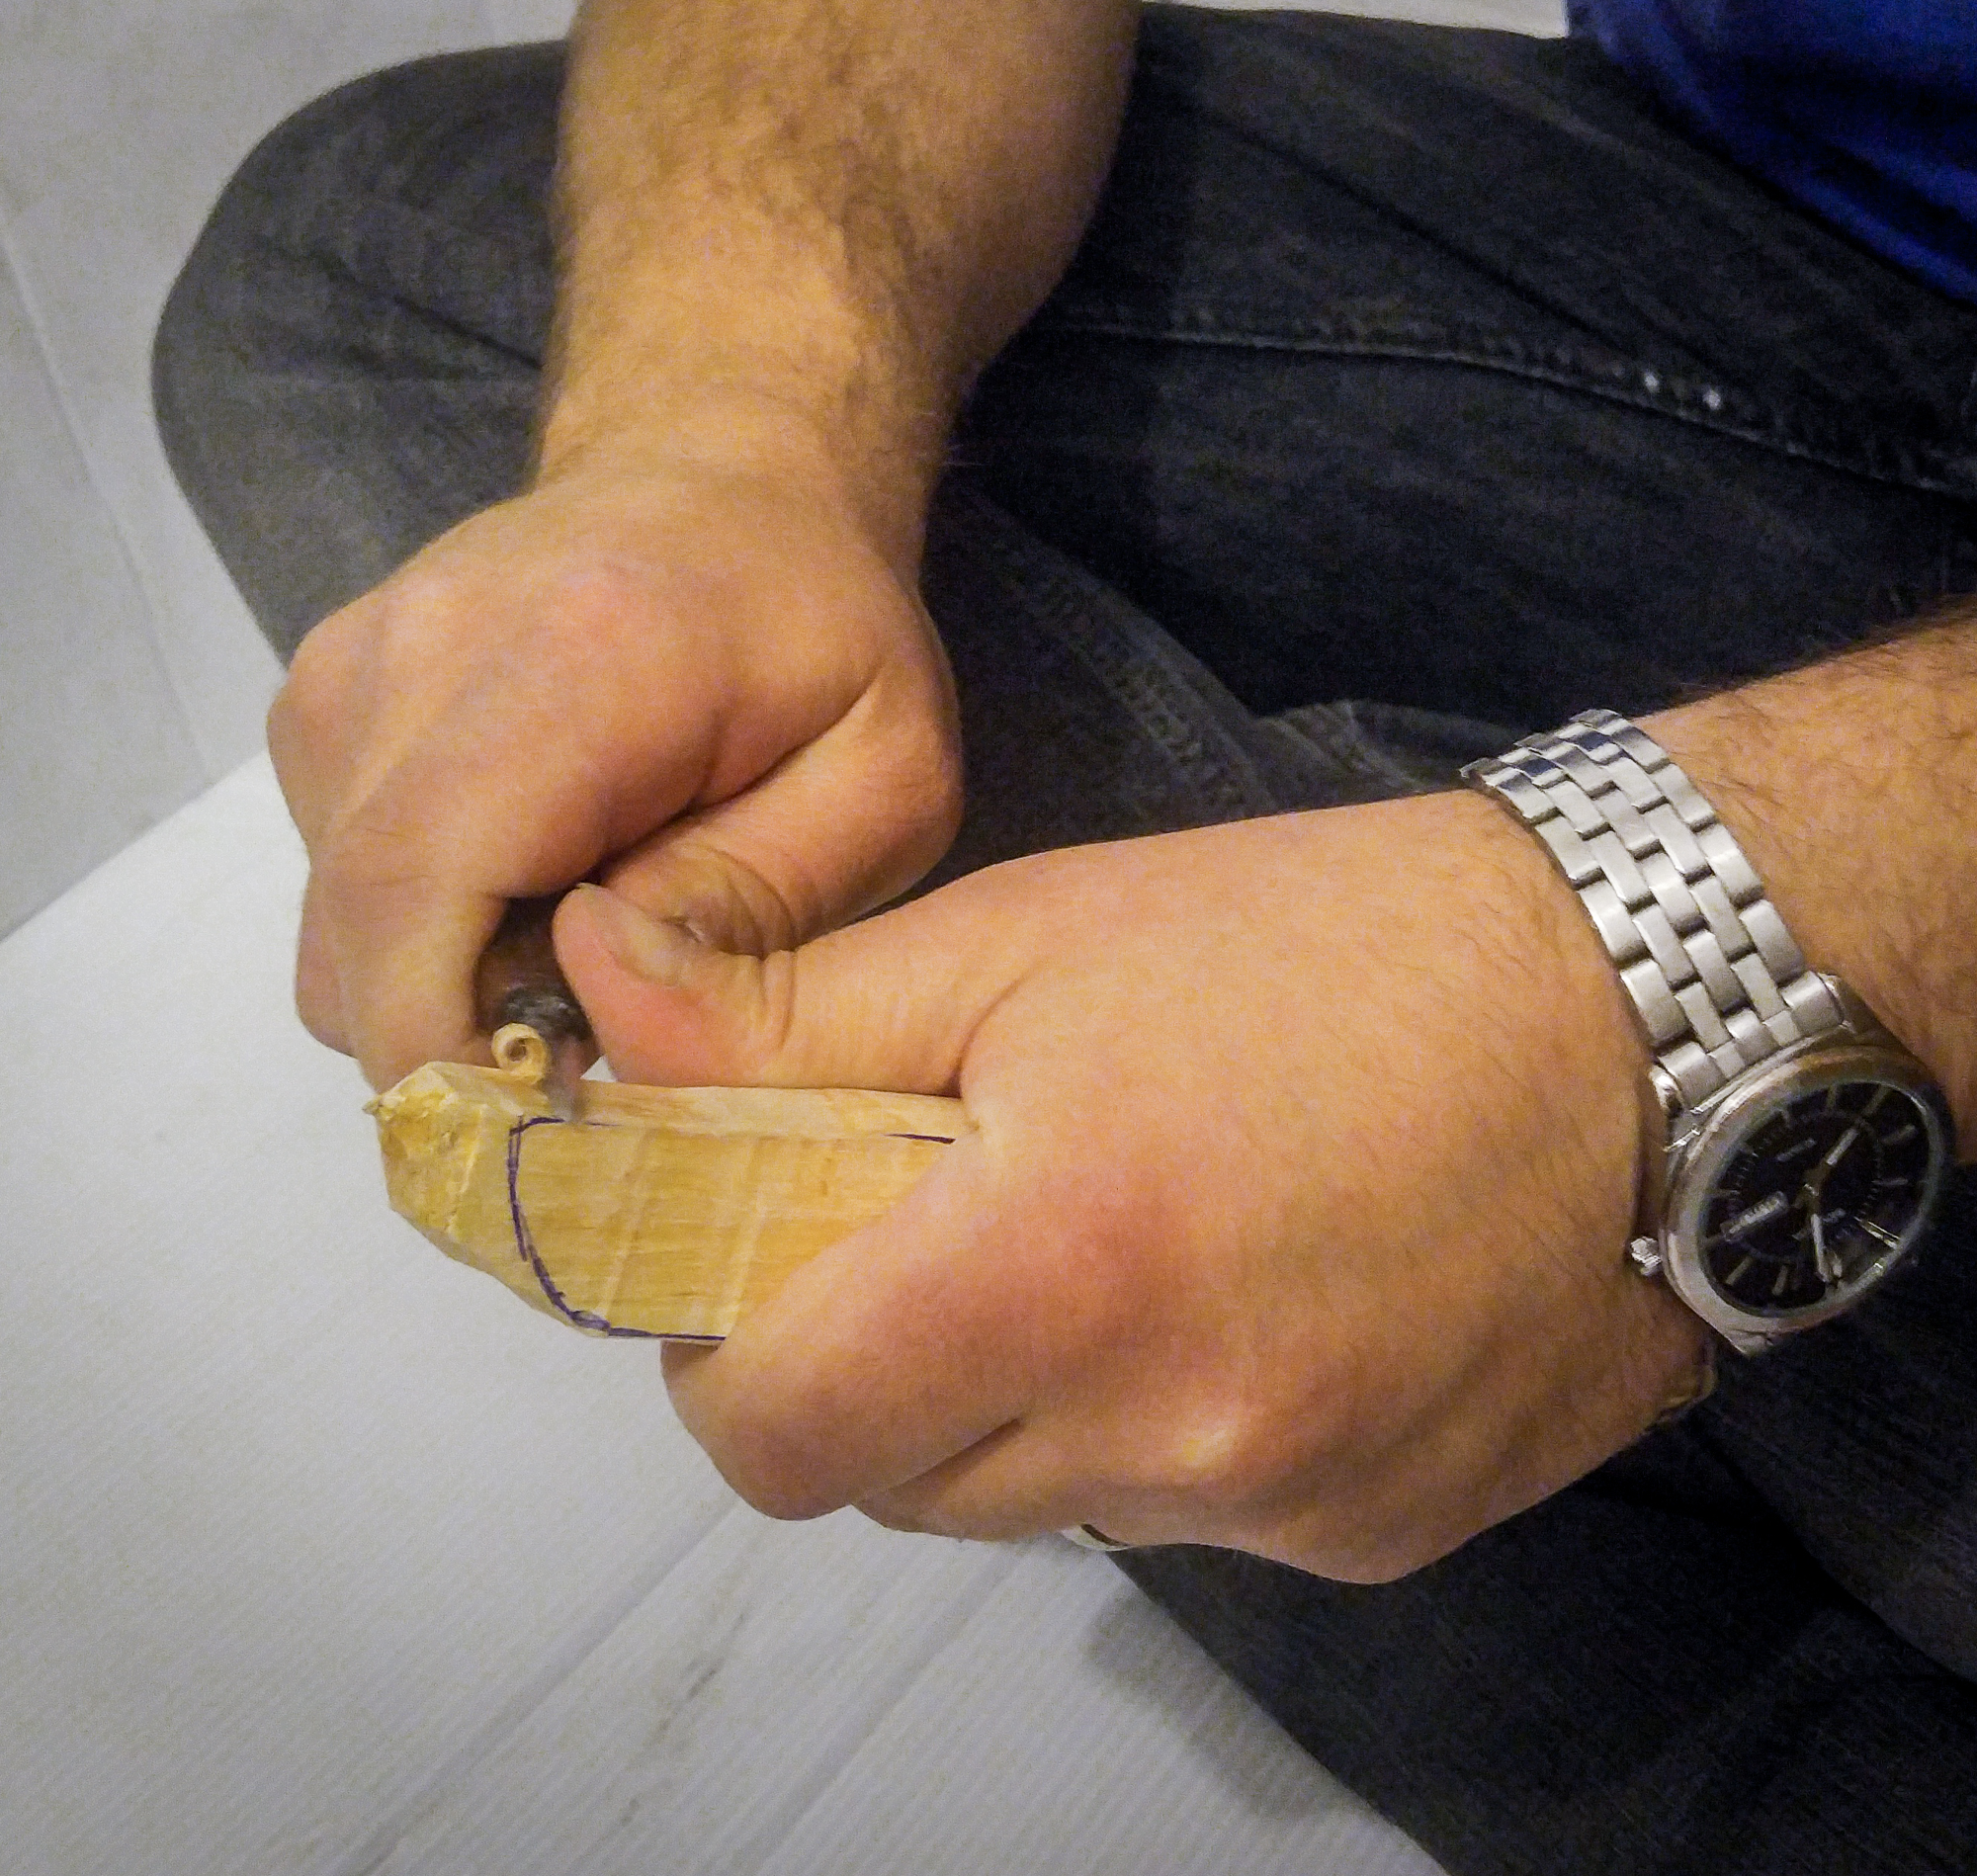
I always start with the blade of the spreader first. Firstly, work around the edge of the knife, removing any wood that is on the outside of your drawn lines. Once that is done, you will be left with a chunky piece of wood in the shape of your spreader; now it’s time to thin it down. Take down each side as evenly as you can. I tend to carve one side down to what I think is half way and then carve the other side down to join in the middle. However, to help ensure the blade is carved evenly you may want to cut one side and then flip the piece over and do a cut on the other side. Repeating that pattern may seem a little tedious, but I’m sure it will help.
The knife stroke I use for this step is called a ‘push cut’. Hold the knife in your dominant hand and the spreader in your other hand. Now place the thumb of the hand holding the spreader onto the BACK of the blade and use that to help push the blade along; this will help give strength and also accuracy to your cuts.
Step 7
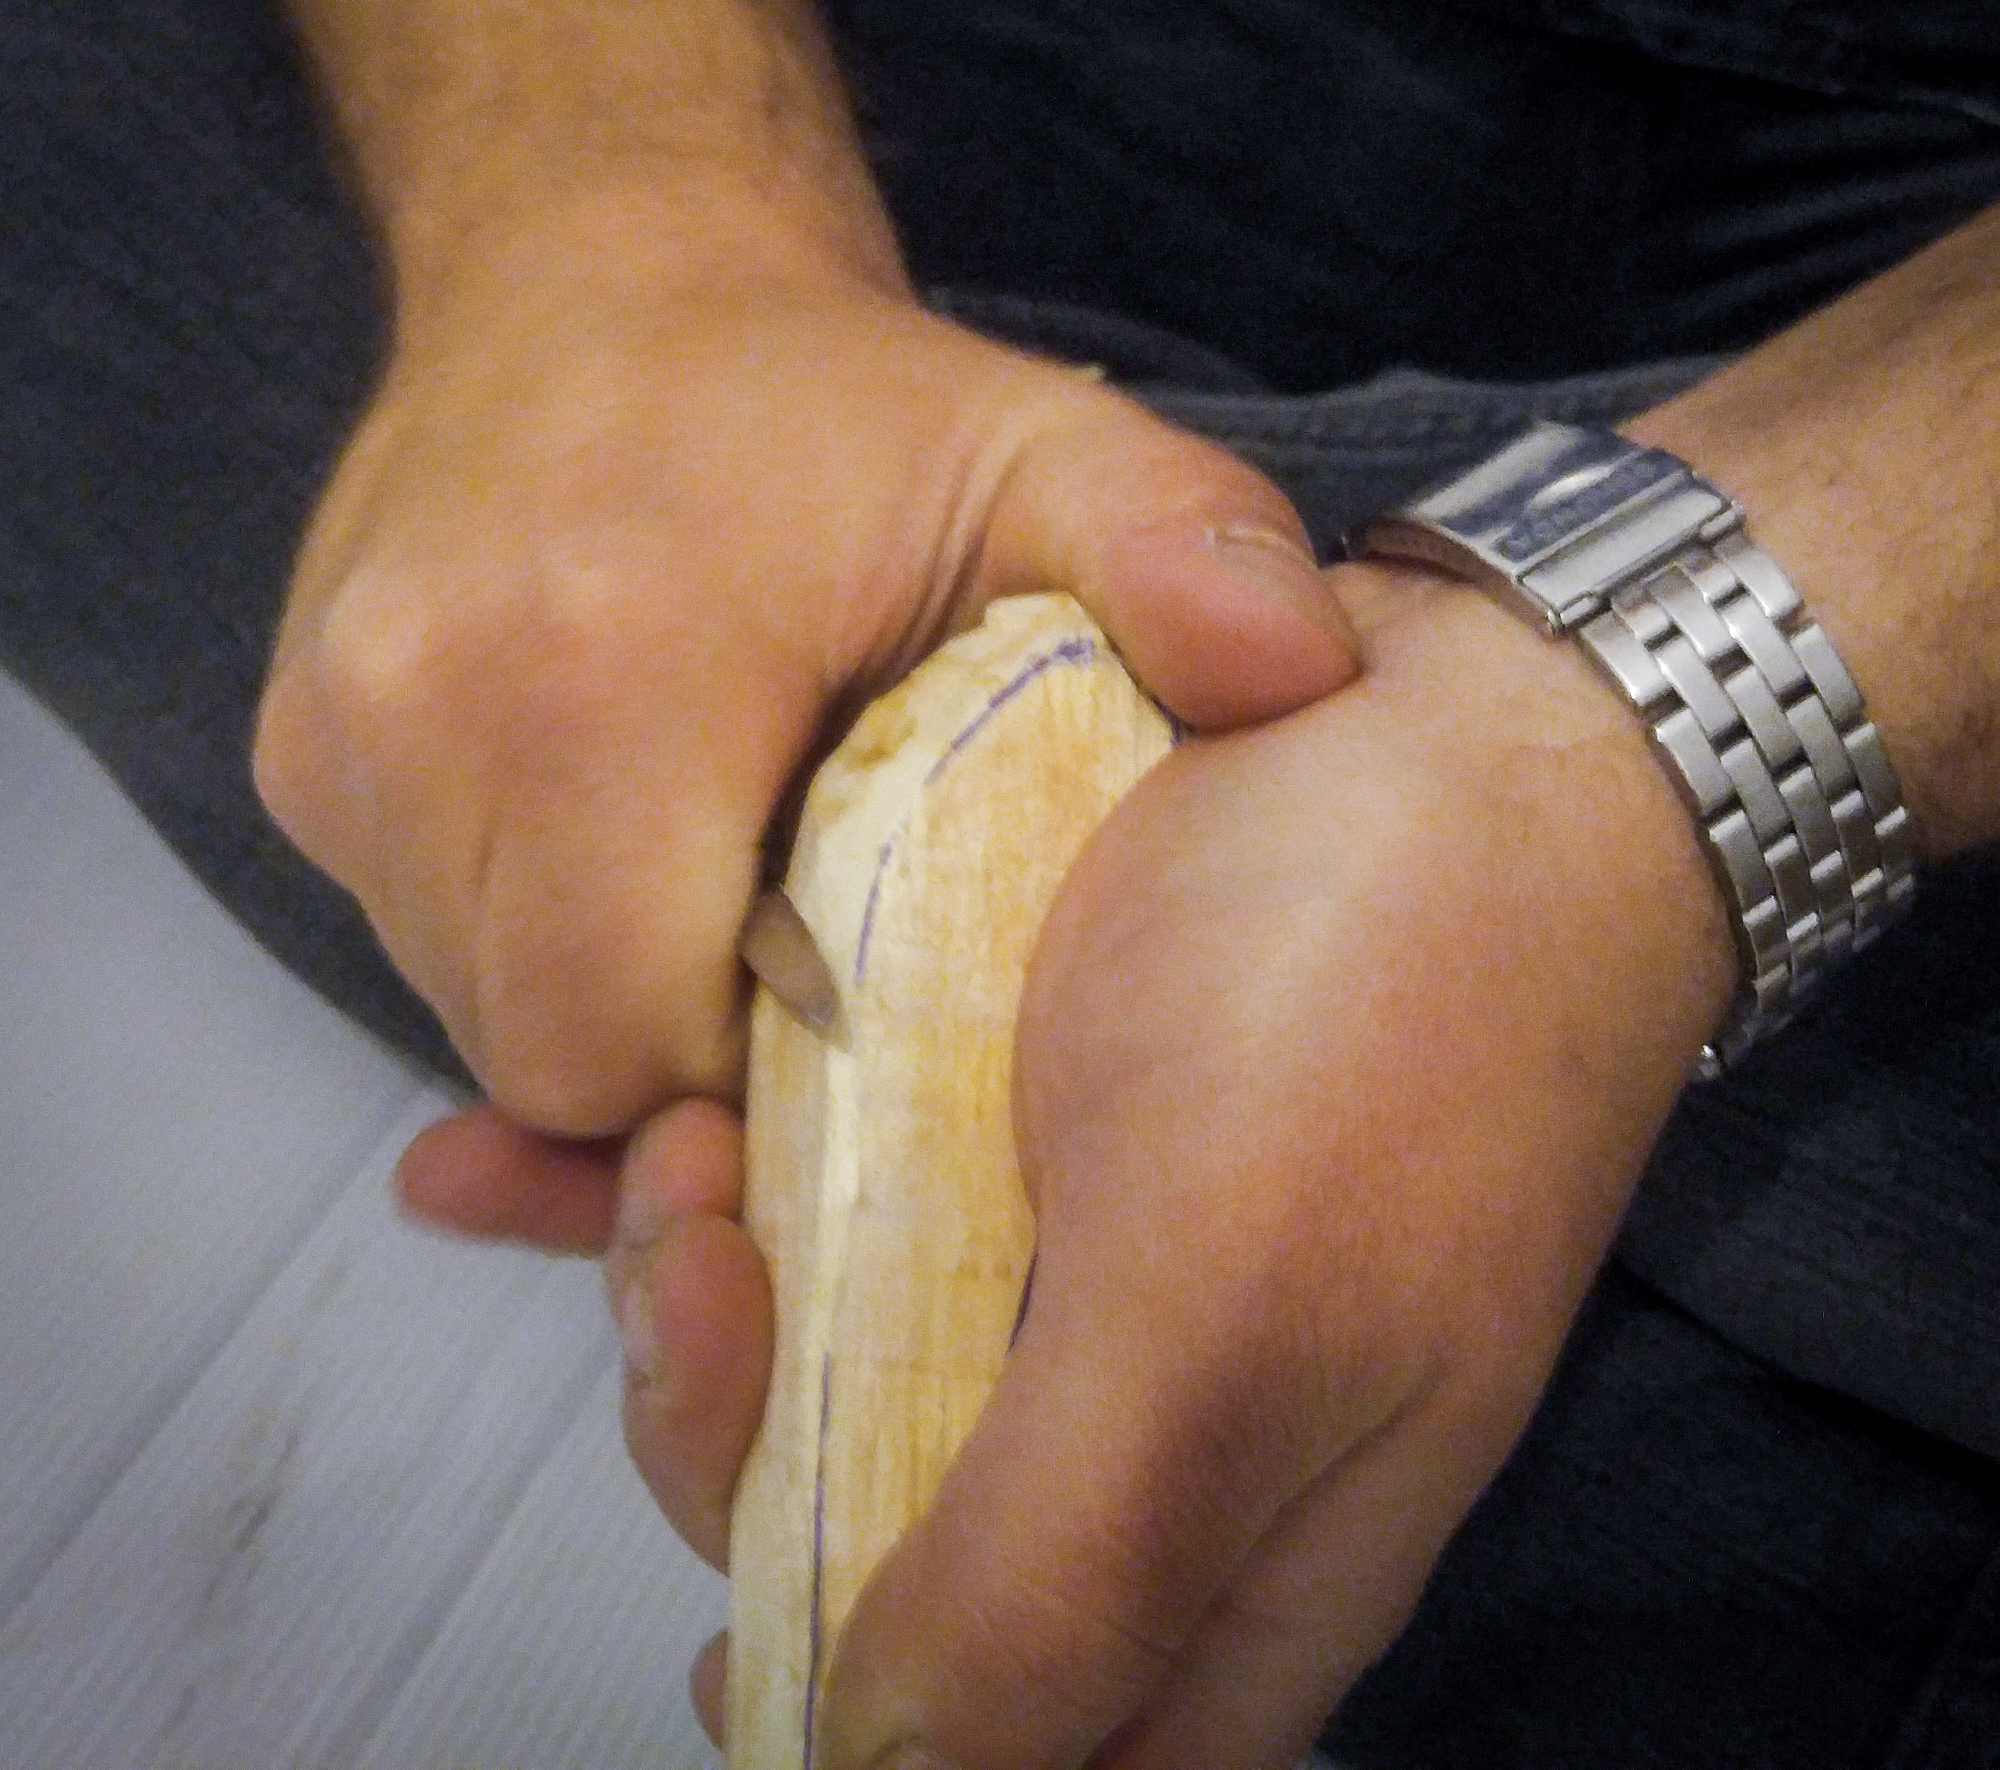
Once you have the blade even and looking like a spreaders’ blade, it’s time to turn to the handle. Start by removing all the excess wood around your lines like you did in the previous step. Once all of your lines have been erased by your knife, be a little creative; round off the edges a little, or a lot. I like to have an almost circular look to my handles, whereas others may prefer flatter, square looking handles, the choice is yours.
The knife cuts I use for this step is the ‘push cut’ (see the previous step) and the ‘draw cut’ (or ‘pull cut’ as it may be known to some people). This one may seem a little dangerous, but if done correctly it’s not.
Keeping the knife in your dominant hand, hold it with the blade facing towards you, also hold the piece in this same hand. You can use your other hand to wrap around the piece to give extra stability. Now using slow and controlled motions, push the piece with your dominant hand’s thumb away from you and pull the knife with your fingers towards you. Imagine you are peeling a potato, it is the same cut as that. If you don’t feel comfortable doing this cut, you can continue using the push cut for this whole project.
Keep going with steps 6 and 7 until you are happy; the blade and the handle straight and at the thickness and shape you desire.
Step 8

Now you can stop here if you would like, or skip this step and go to step 9, because this step isn’t entirely necessary, it falls to personal taste. This step is of course…sanding.
If you want to sand your piece, here is a detailed way of doing so without making the wood go fluffy whenever it gets wet. Firstly, I should add here, if you have used fresh wood for this project you are going to need to let it dry. Place the piece on a paper towel or inside a plastic bag and leave it in a dark place. I put my projects in the cupboard, don’t just leave it in the sunlight as it may dry too quickly and you will risk it cracking.
If you are using store bought wood, it has usually been dried already so you can just start straight away.
- Once it’s time to sand, here it’s what you need: different grit sandpaper and a whole lot of patience. I use 60, 150, 240, and 320 grits for this project.
- Start with the 60, it is the roughest grit and will remove the most wood. Always sand with the grain, not against it as the scratches left behind (by going against the grain) will be very hard to remove.
- Once you have removed the tool marks and the splinters or other abnormalities caused by the carving process it is time to move to the 150 grit. Try to ensure that all the major marks are removed by this stage, the finer the grit, the harder it is to remove bigger marks.
- Work your way through the 150 grit and 240 grit doing the same as you did with the 60 grit. Once you are finished with the 240 grit, your spreader should be silky smooth.
- Now begins a tedious process…but a crucial one. Get the spreader wet and let the spreader dry again. You will feel that, what was once silky smooth, is now fluffy and rough. Using the finest sandpaper (320), very gently sand away the fluffy surface, try not to sand too much, you don’t want to expose a whole new layer of wood; you just want to remove the fluffy surface. I repeat this process three times.
Step 9
Finish it! By now your spreader is silky smooth and won’t get fluffy when wet, but it is still advised to use a food-safe finish to help prolong its life. There are many oils which will soak into the wood and help extend it which are food safe, ranging from mineral oil, walnut oil, even your household olive oil will do.
Personally, I use a mineral oil and beeswax finish. I made this by melting the beeswax and stirring it into the mineral oil and letting it cool to make a nice gooey paste. There are many tutorials for this on YouTube.
Once you have your finish of choice, use a rag or a paper towel to wipe it onto the wood, use enough so that the wood is still wet and oily once you are finished. Leave this to soak in overnight. Once morning breaks and the birds chirp, run to your spreader and with another rag or paper towel wipe off any excess oil and voila, the spreader is finished and should last you or someone else many wonderful years of…spreading.
Here’s my final result!

Show Us What You’ve Made
We would love to see what you came up with. Send us a picture and you just may be featured on our Instagram page. Be sure to follow us (@FGGDesigns) so you can see if you made it!