
Don’t you think it’s exciting to receive a card by “snail mail”? You know, with the “actual” mailman who comes by the house and drops it in the “actual” mailbox? Remember? That metal box that now only gets filled with some bills and ads? Don’t get me wrong; I do like the convenience of an e-card, (sometimes)…but sending or receiving a card by mail is much more enjoyable, for the sender as well as for the person who receives it.
Summer Break is Around the Corner
Since summer break is around the corner, we thought it would be fun to give you and your kids something to do, other than hanging out behind the TV, video games, or Facebook. Let’s make some snail mail to encourage a friend, make grandma smile, or just to have quality time with your child. And what better way than to use something you most likely already have laying around?! The envelopes you received your bills in often have beautiful designs on the inside. We will show you how you can upcycle these old envelopes into some new lovely snail mail.
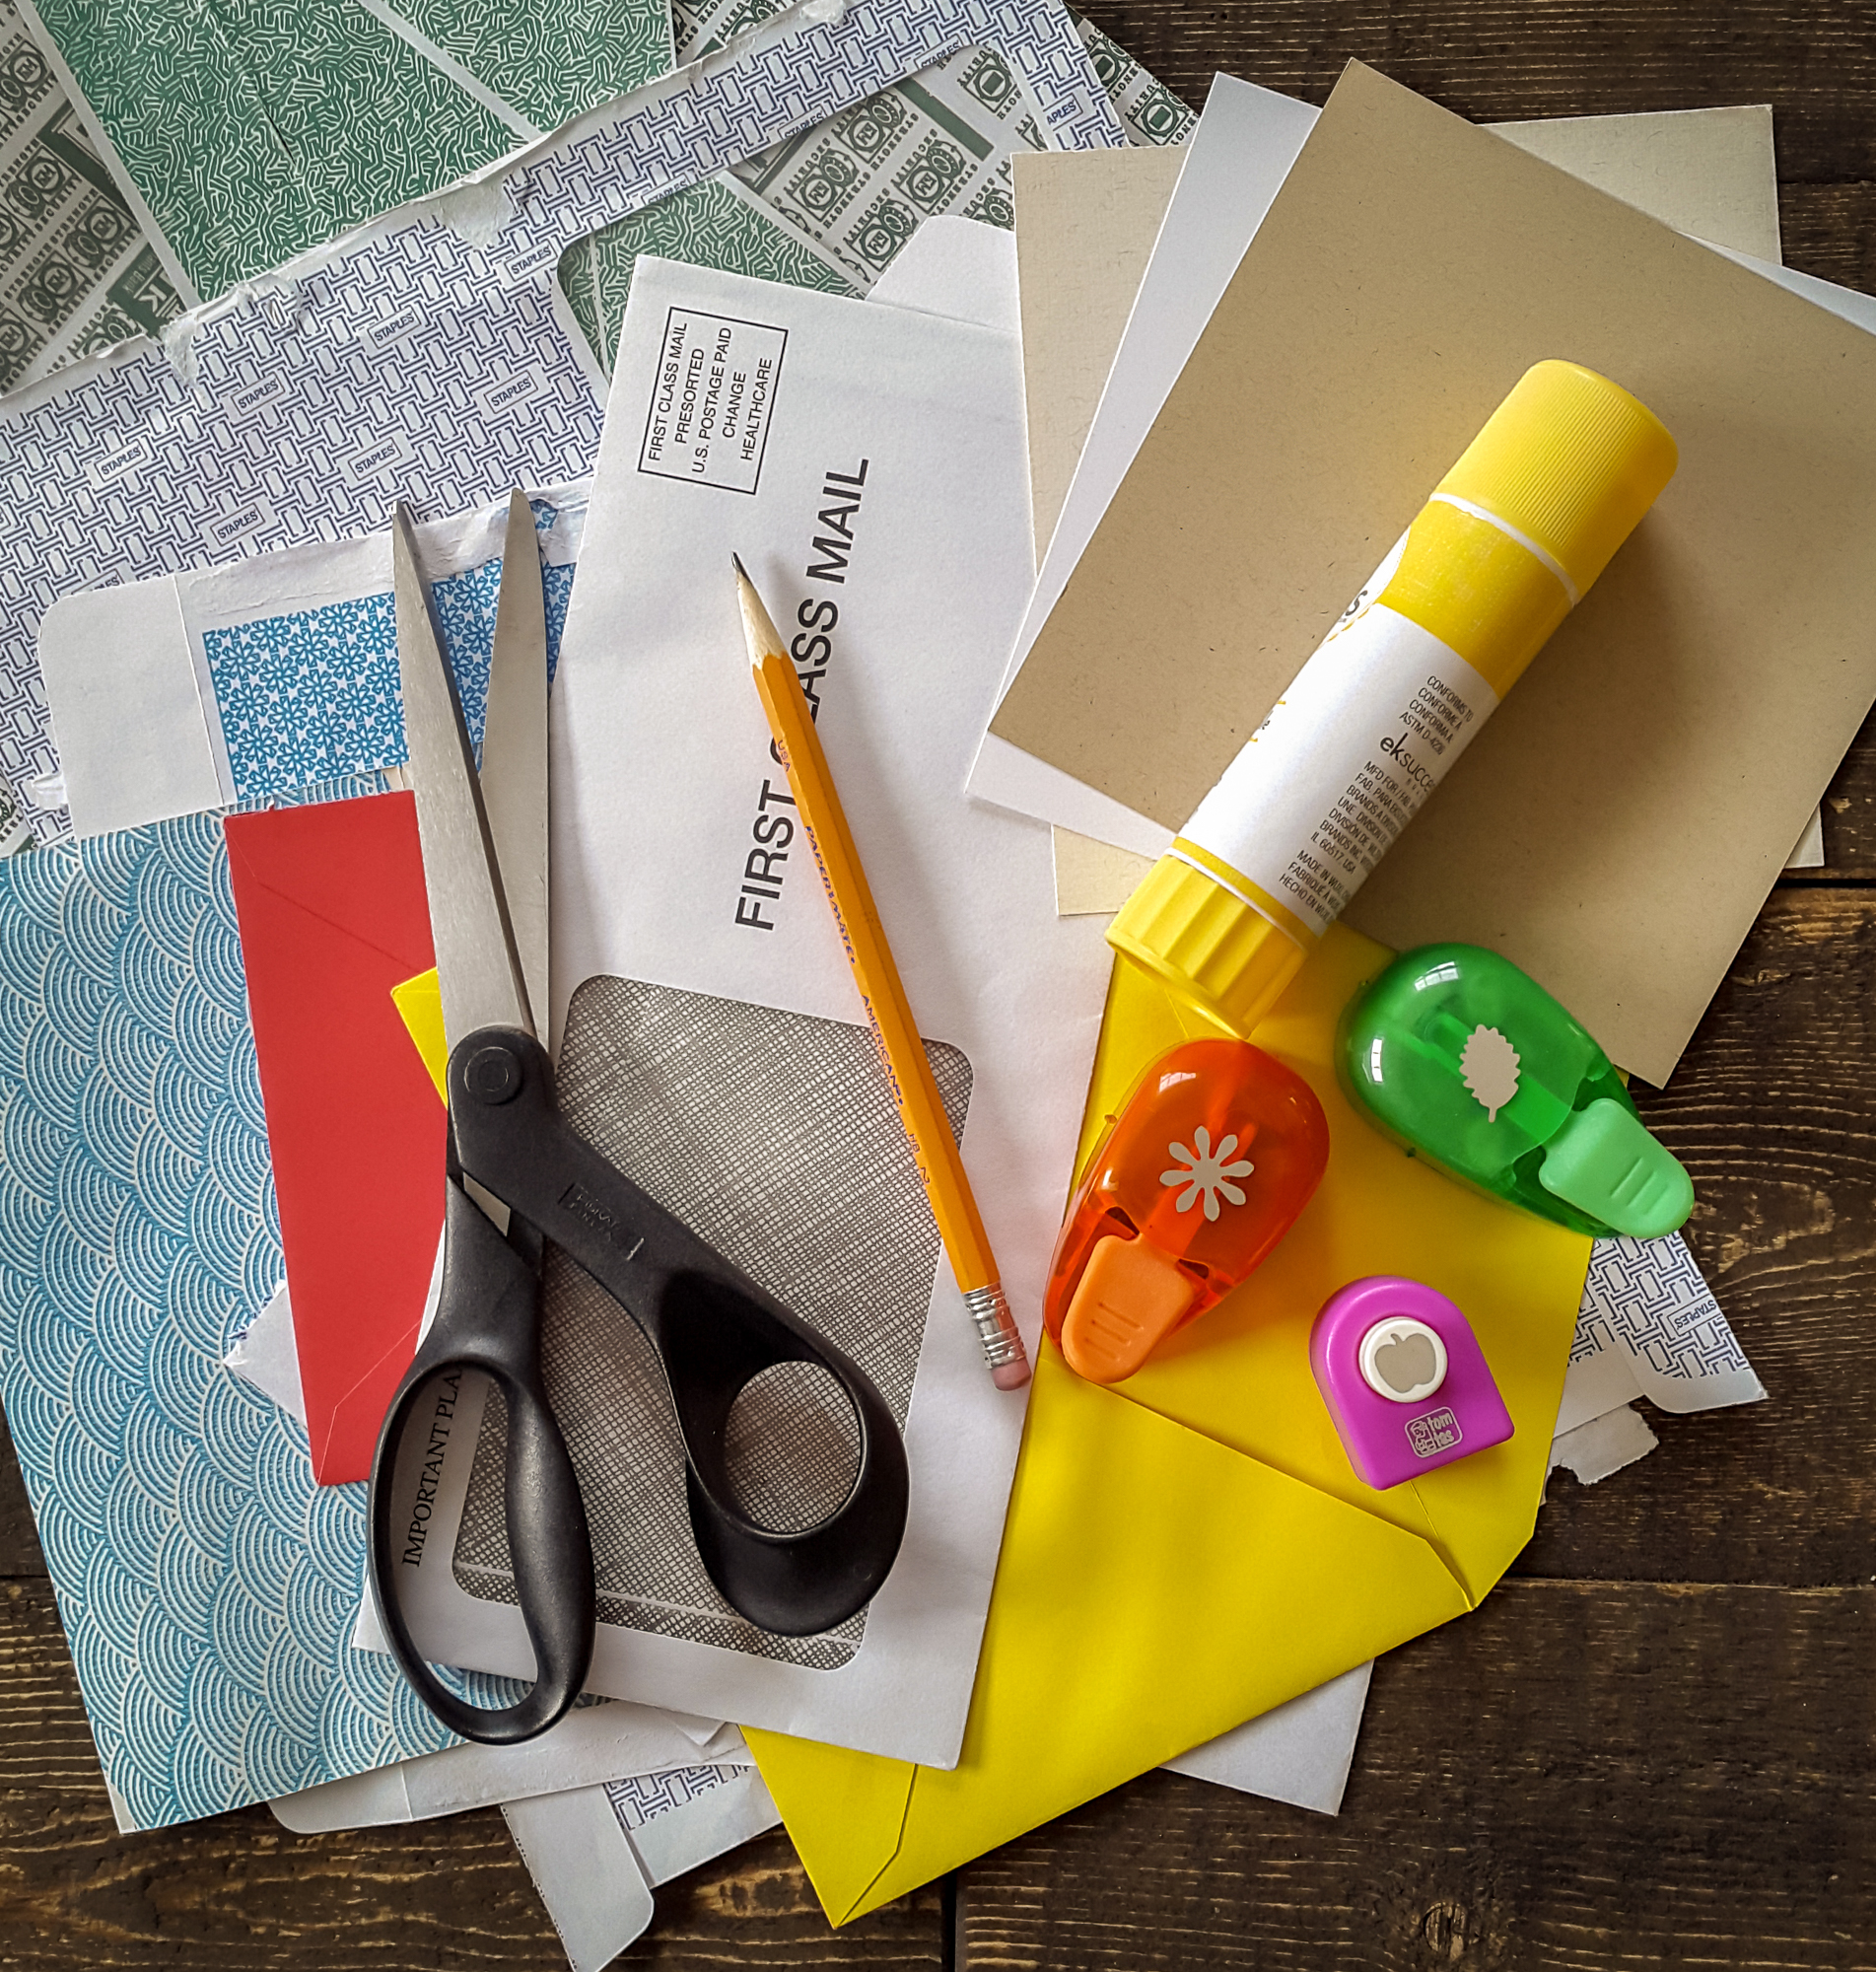
What You Need:
- Old envelopes
- Cardstock
- Scissors
- Glue
-

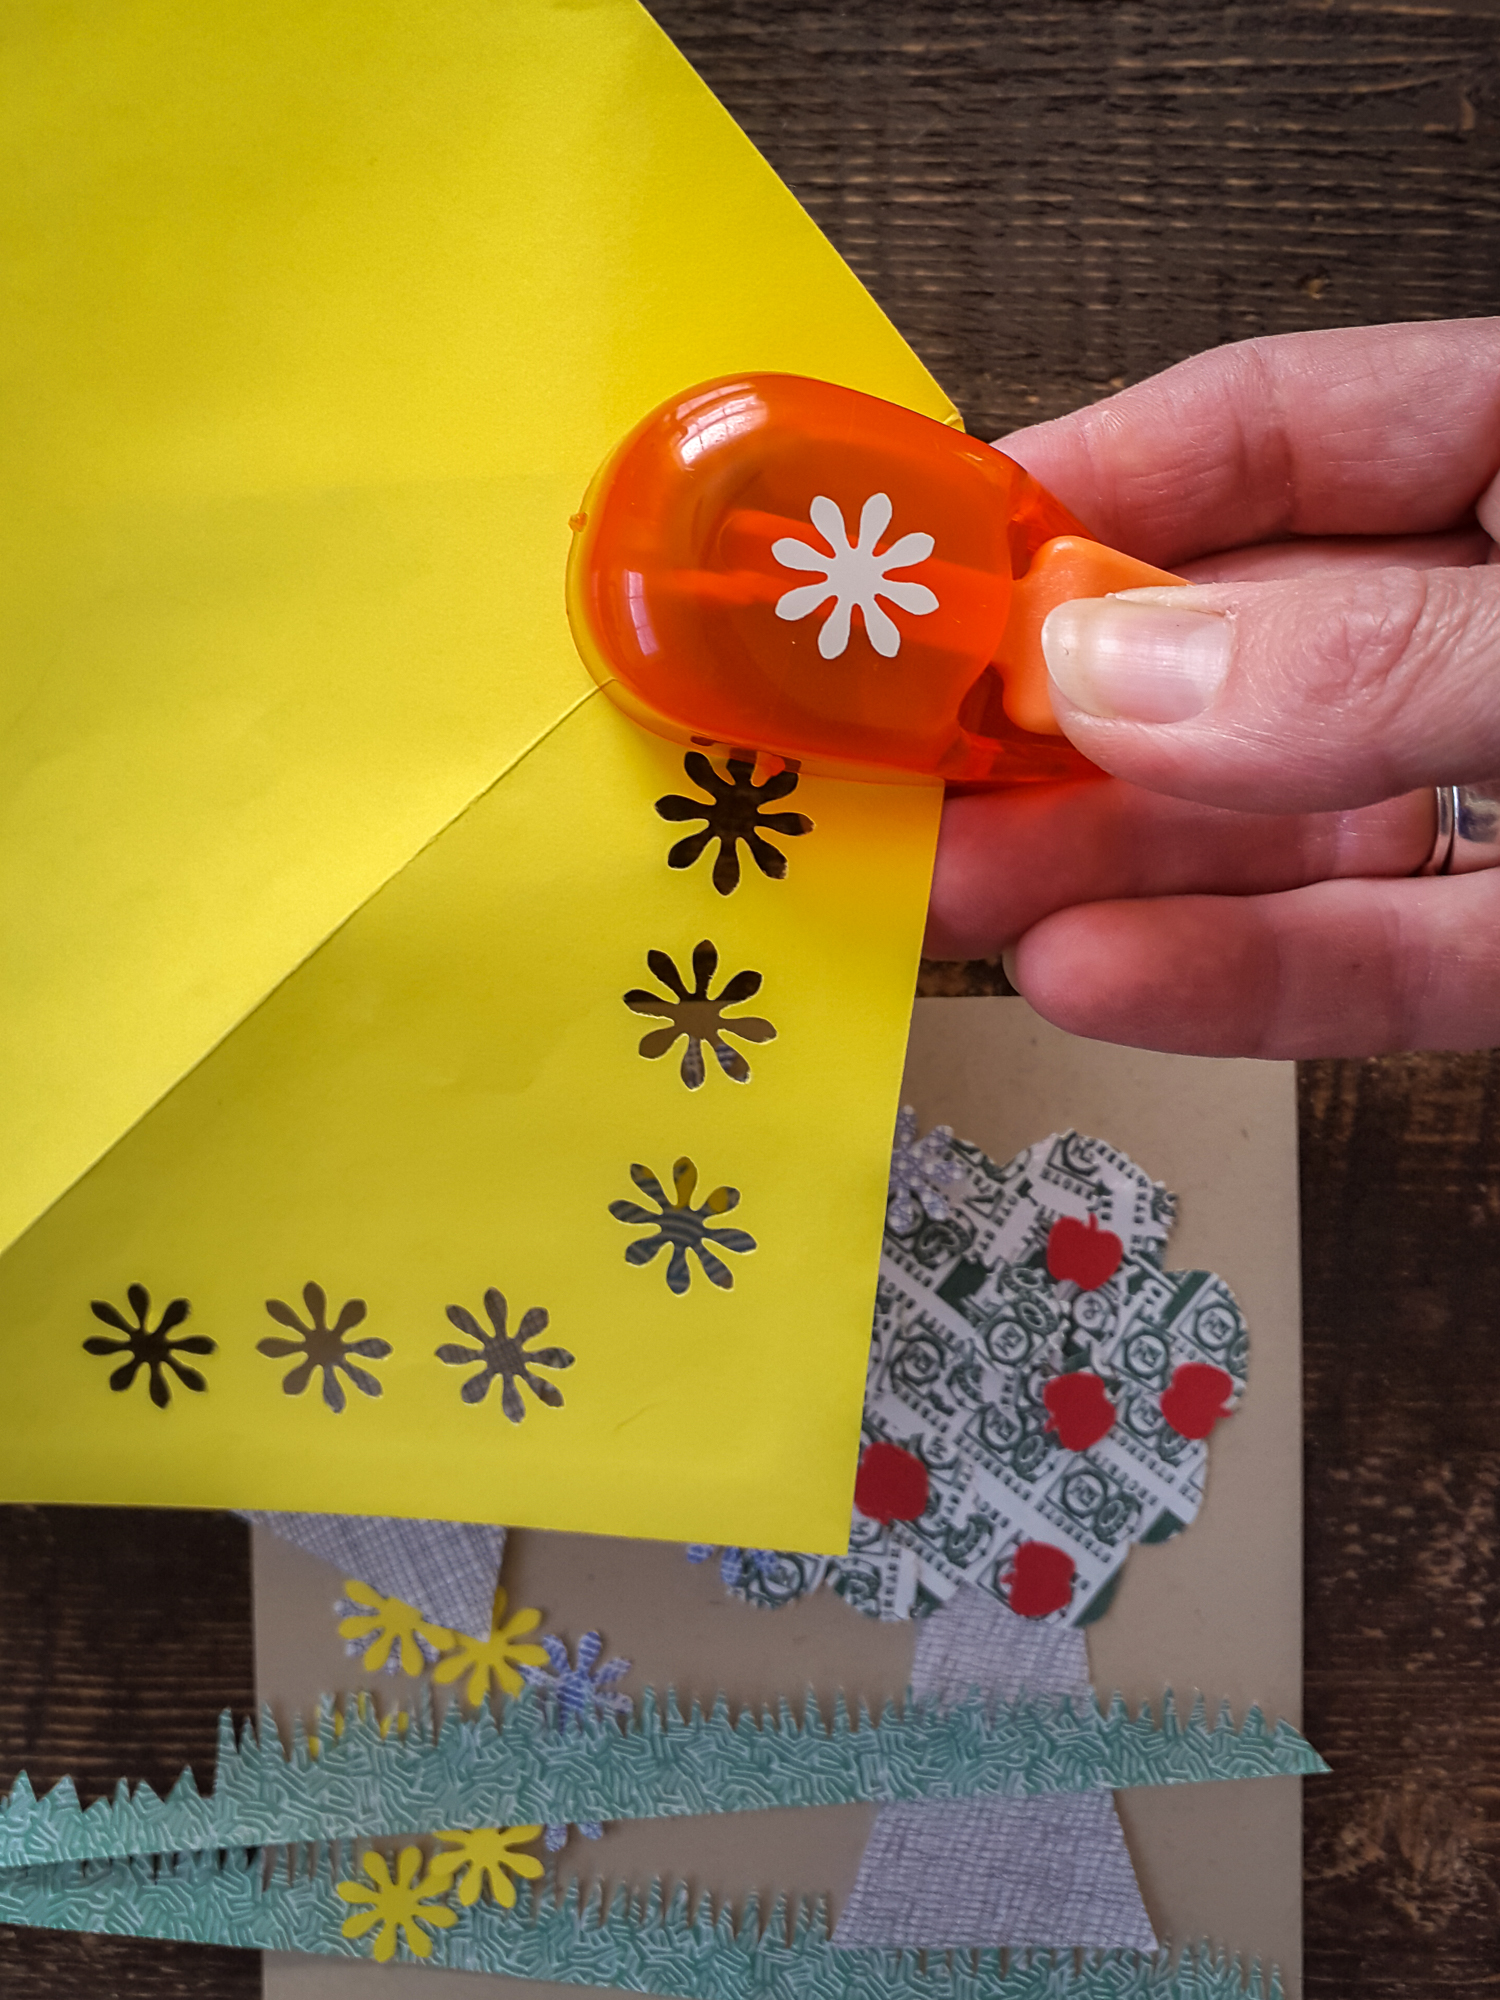
Use punches to cut out designs from old envelopes. Paper punches (optional)
- Stickers for embellishment (optional)
- A new envelope to send the card in.
- Some imagination
Let’s Upcycle!
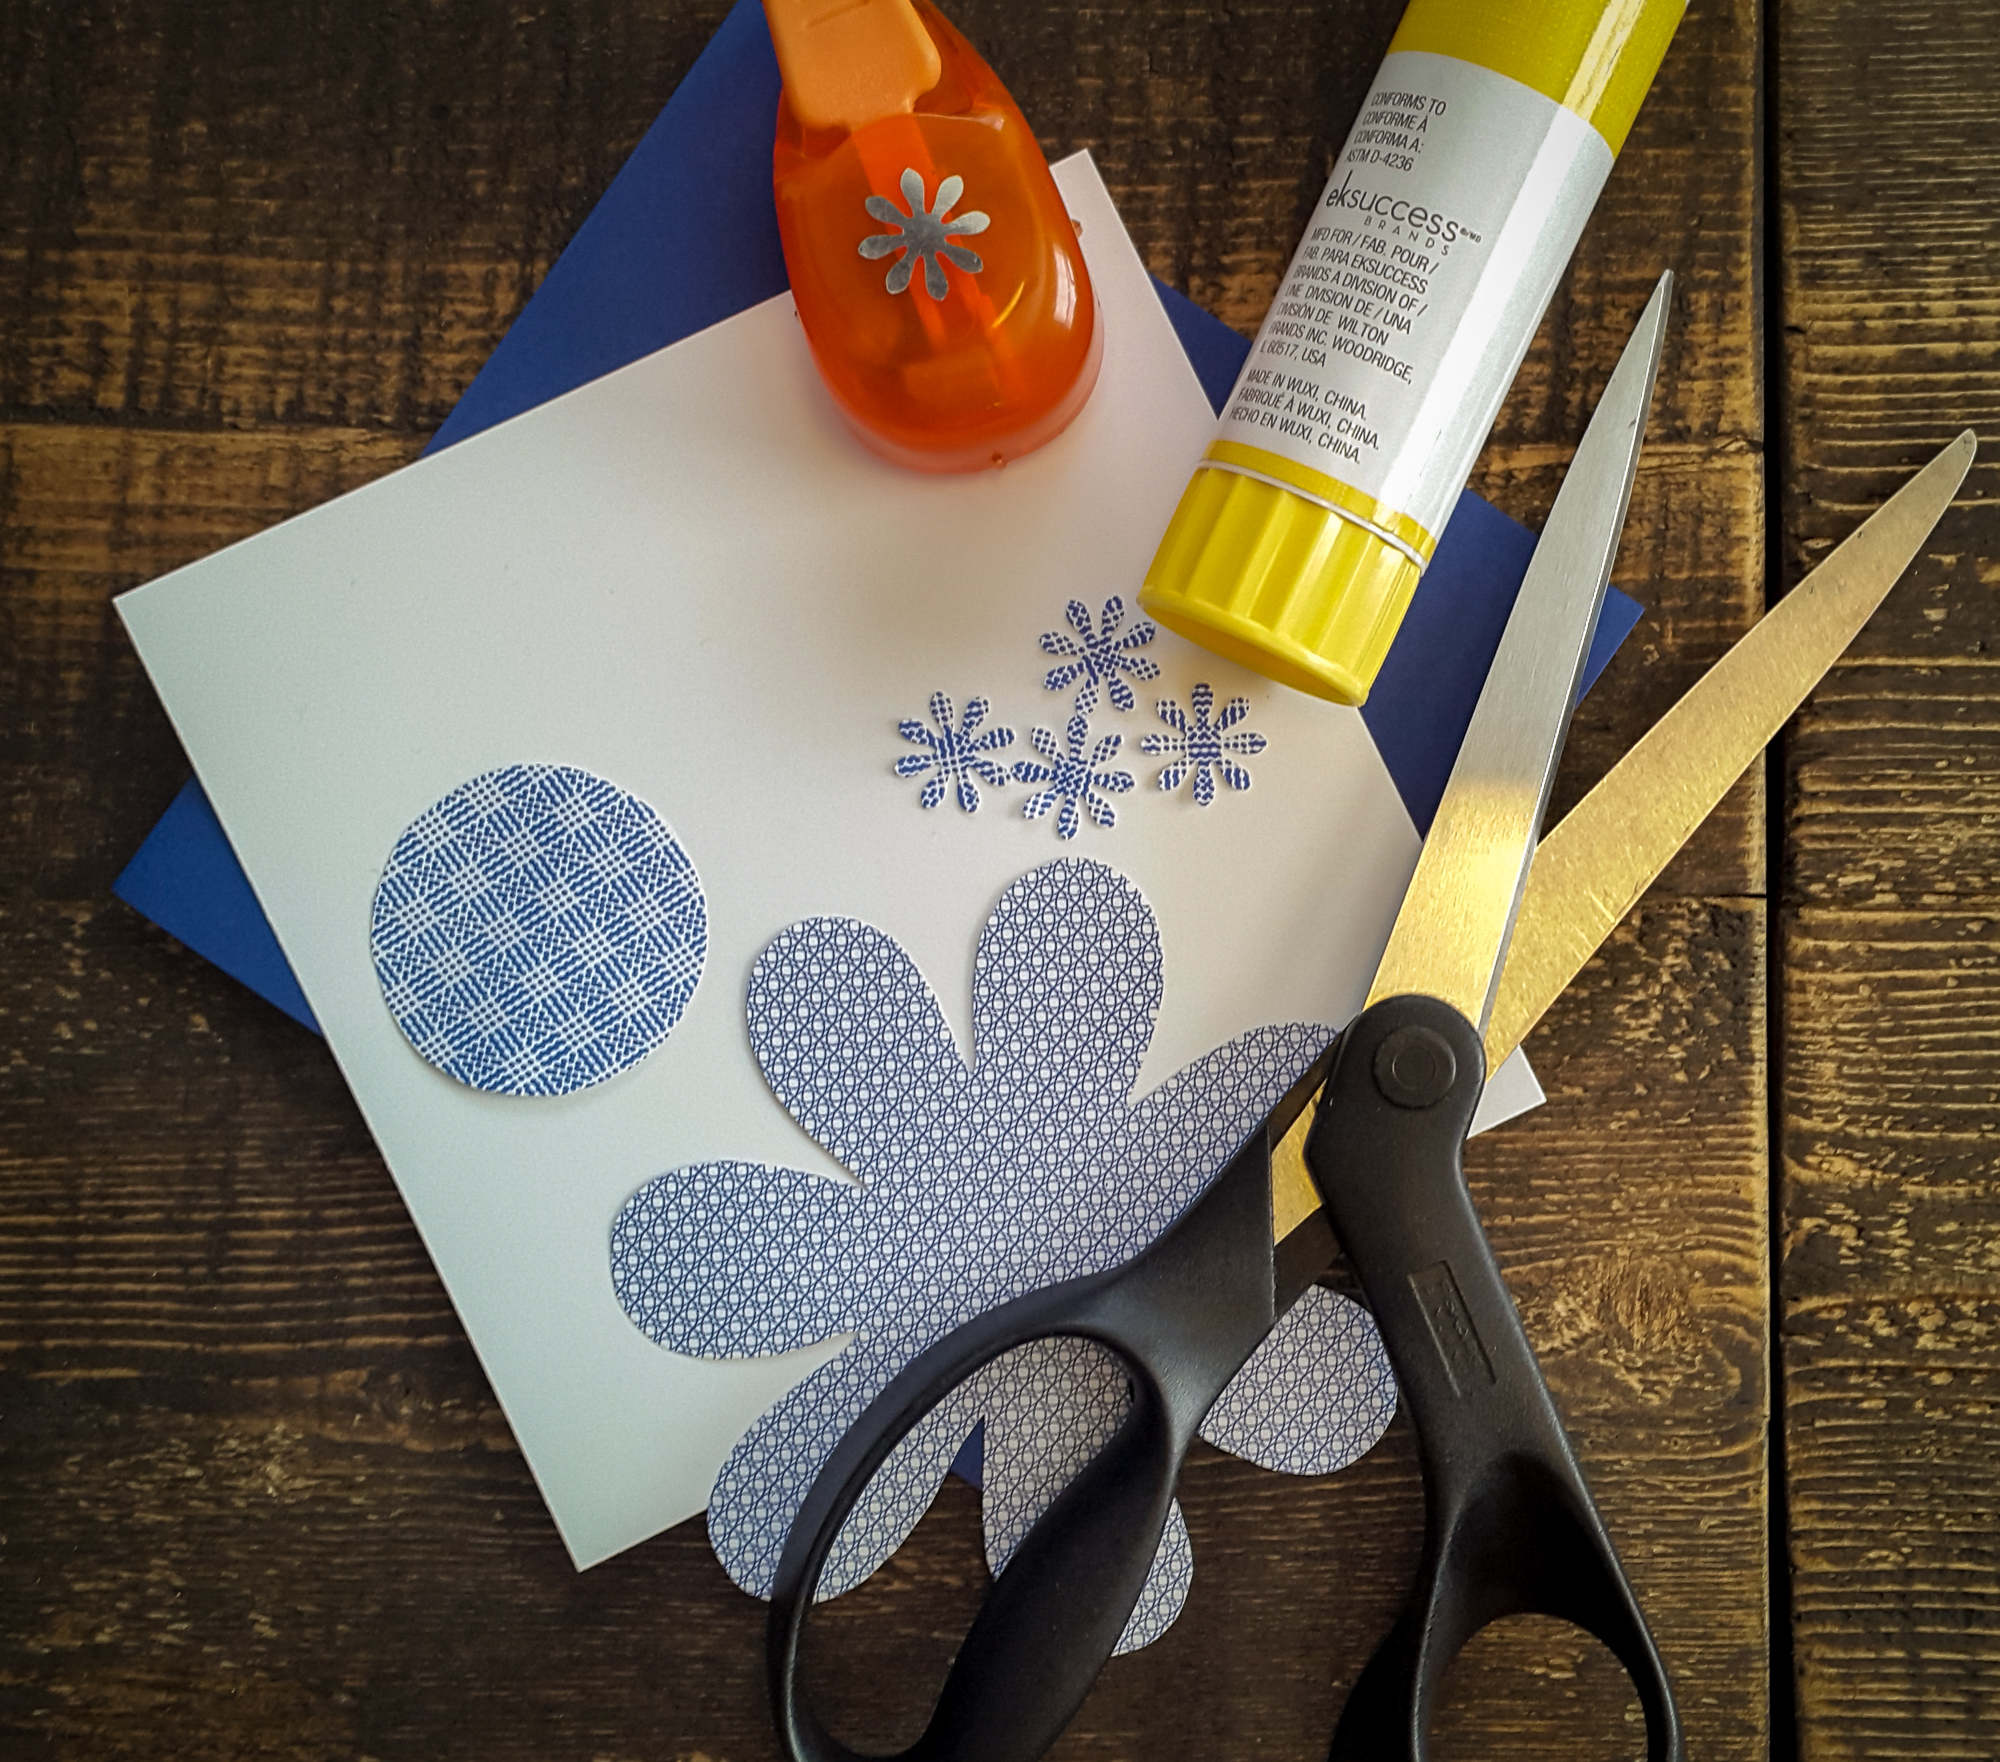
- Cut base card to desired size and fold in half.
- Cut a piece of cardstock slightly smaller than the front of the base card.
- Glue the smaller piece of cardstock on the front of the base card.
- Carefully cut open the old envelopes.
- Use your imagination to draw or trace and cut out your favorite shapes from the old envelopes to start planning the scenery for your card (the possibilities are endless).
Tip: You can use paper punches for a quicker and easier cutting solution.
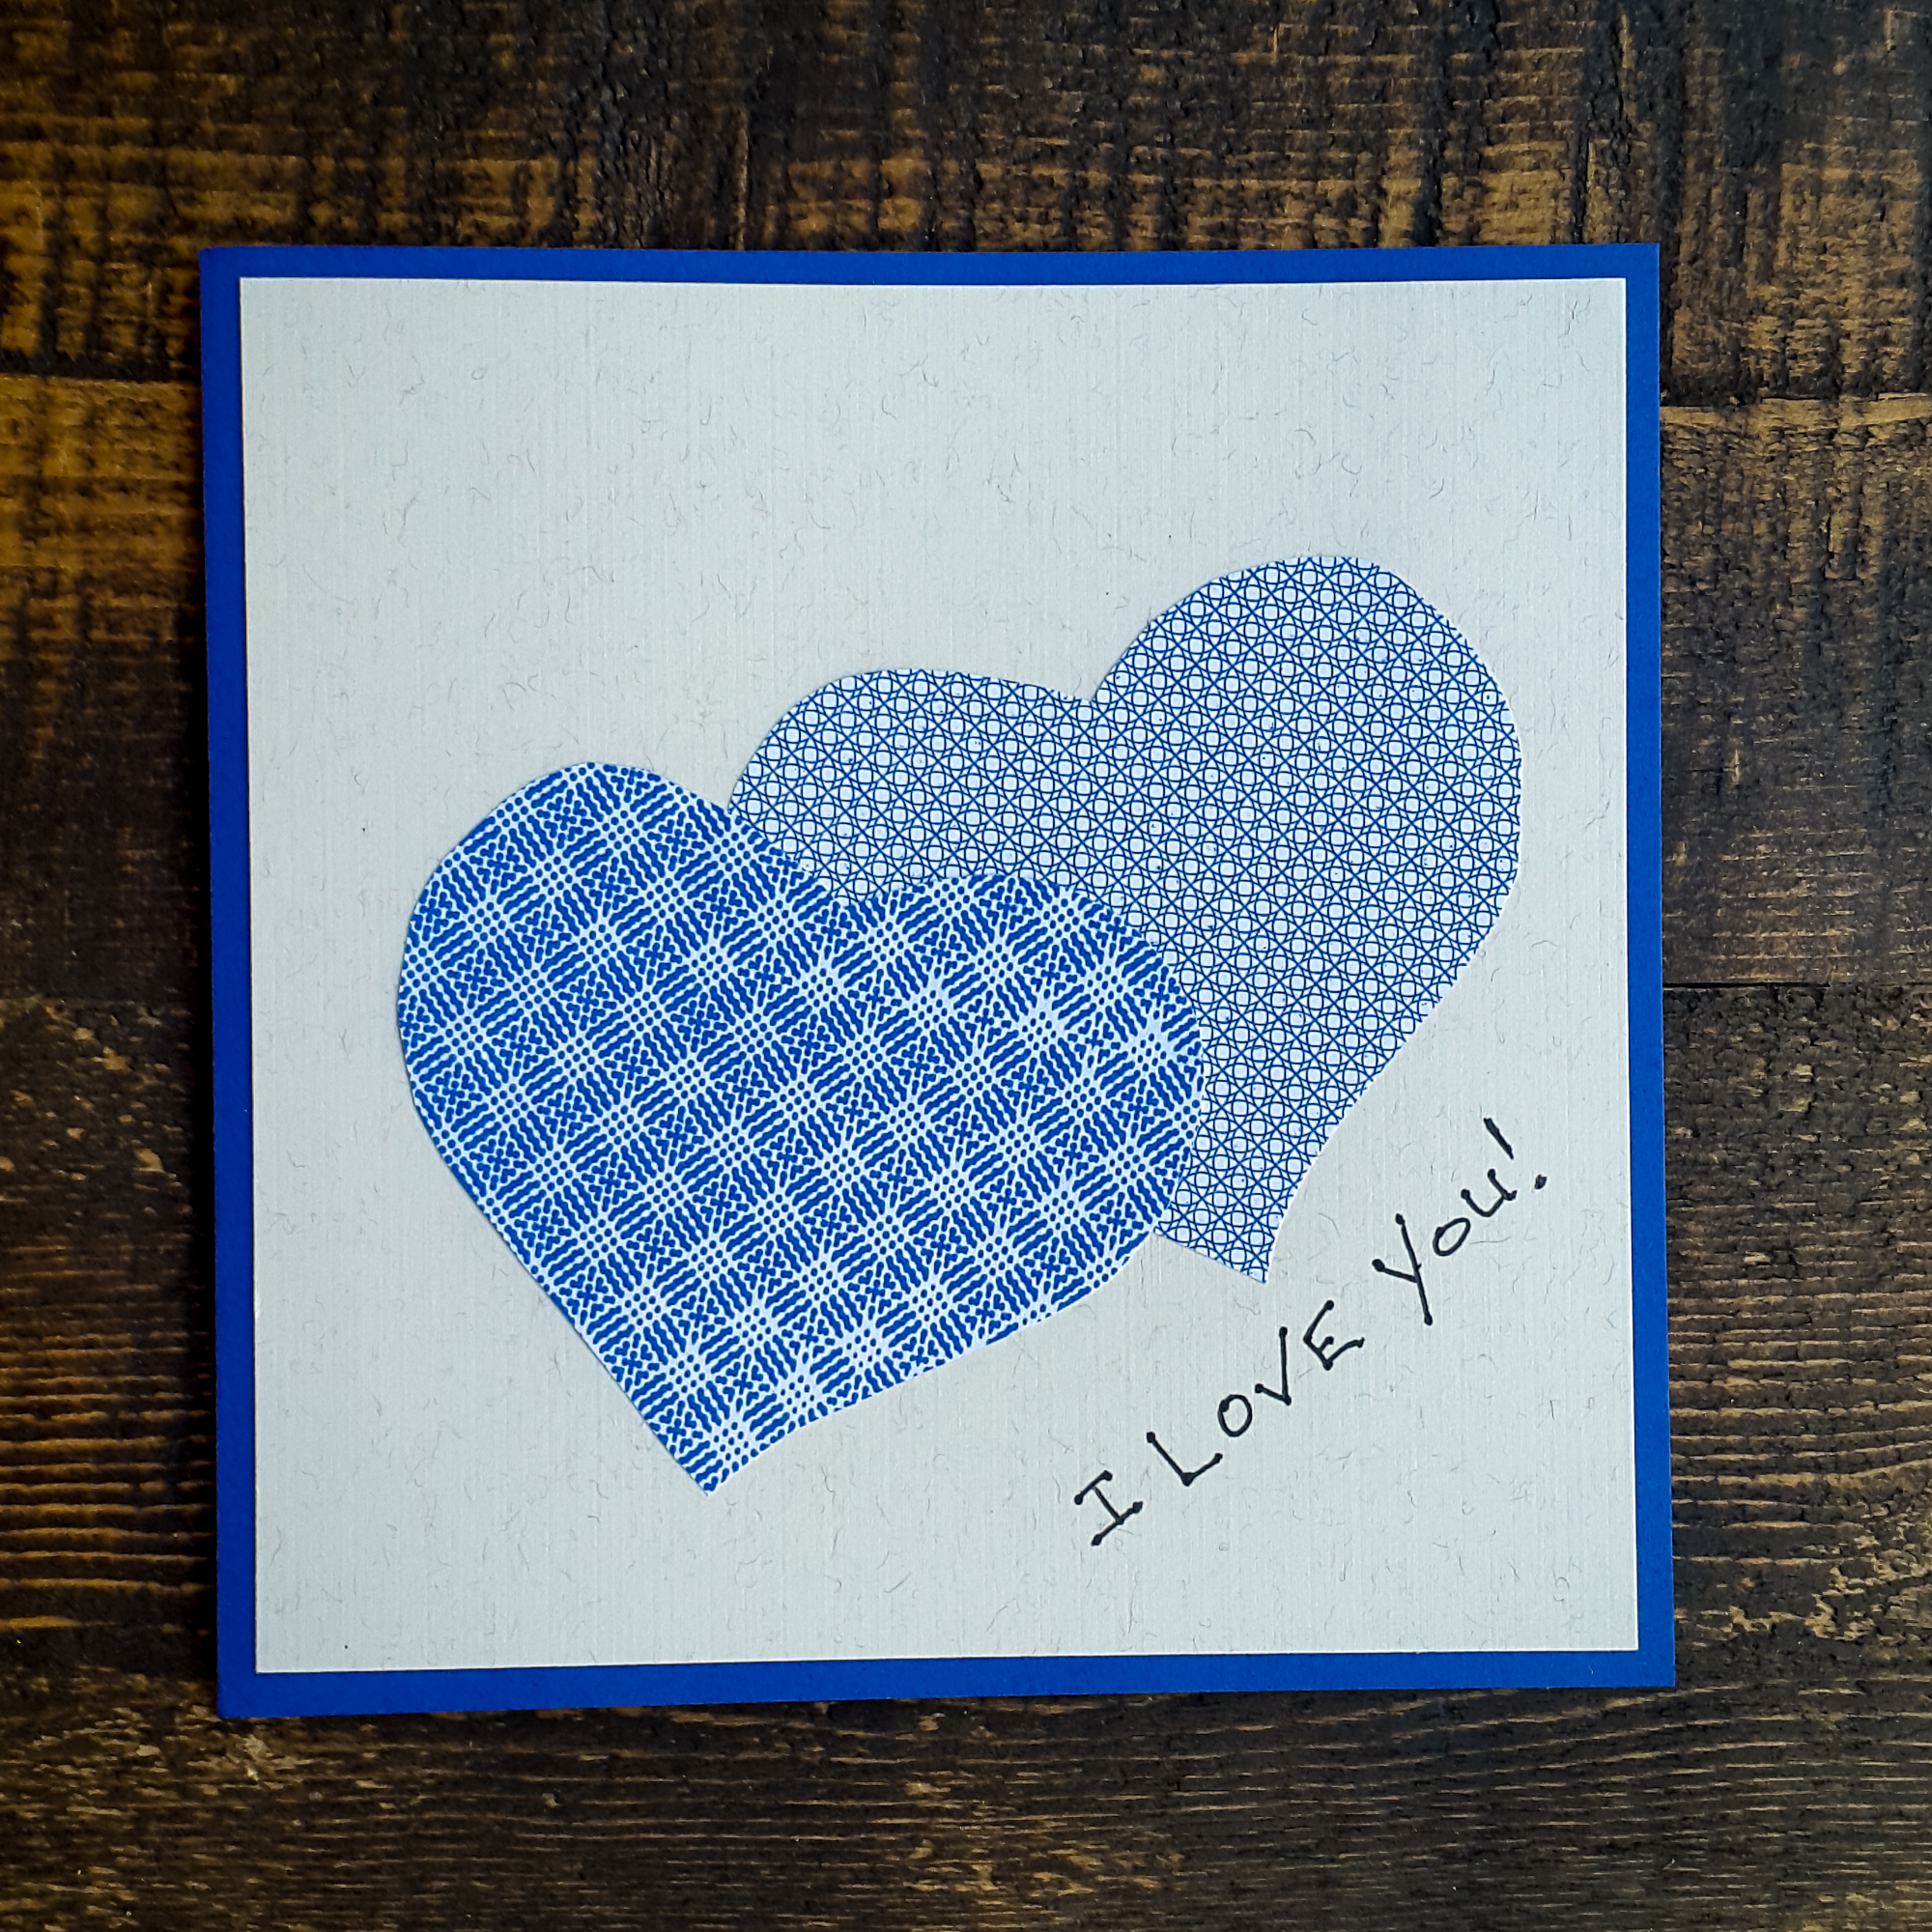
- Now the real fun begins. Decorate the card with the images you have cut out of the envelopes. You can layer them to make it look 3D or just a single layer to keep it simple.
-

Assemble your card Write a message in the card, put it in the new envelope and send it.
The Best Gifts are the “Just Because” Ones
While you are working with your child on this project, talk about how one can encourage someone else with something as simple as a handmade card. You could also pray together for the person you are going to send it to that it might be a blessing and encouragement. One might expect a birthday card, but the best gifts are the “no special reason” and “just because” ones.
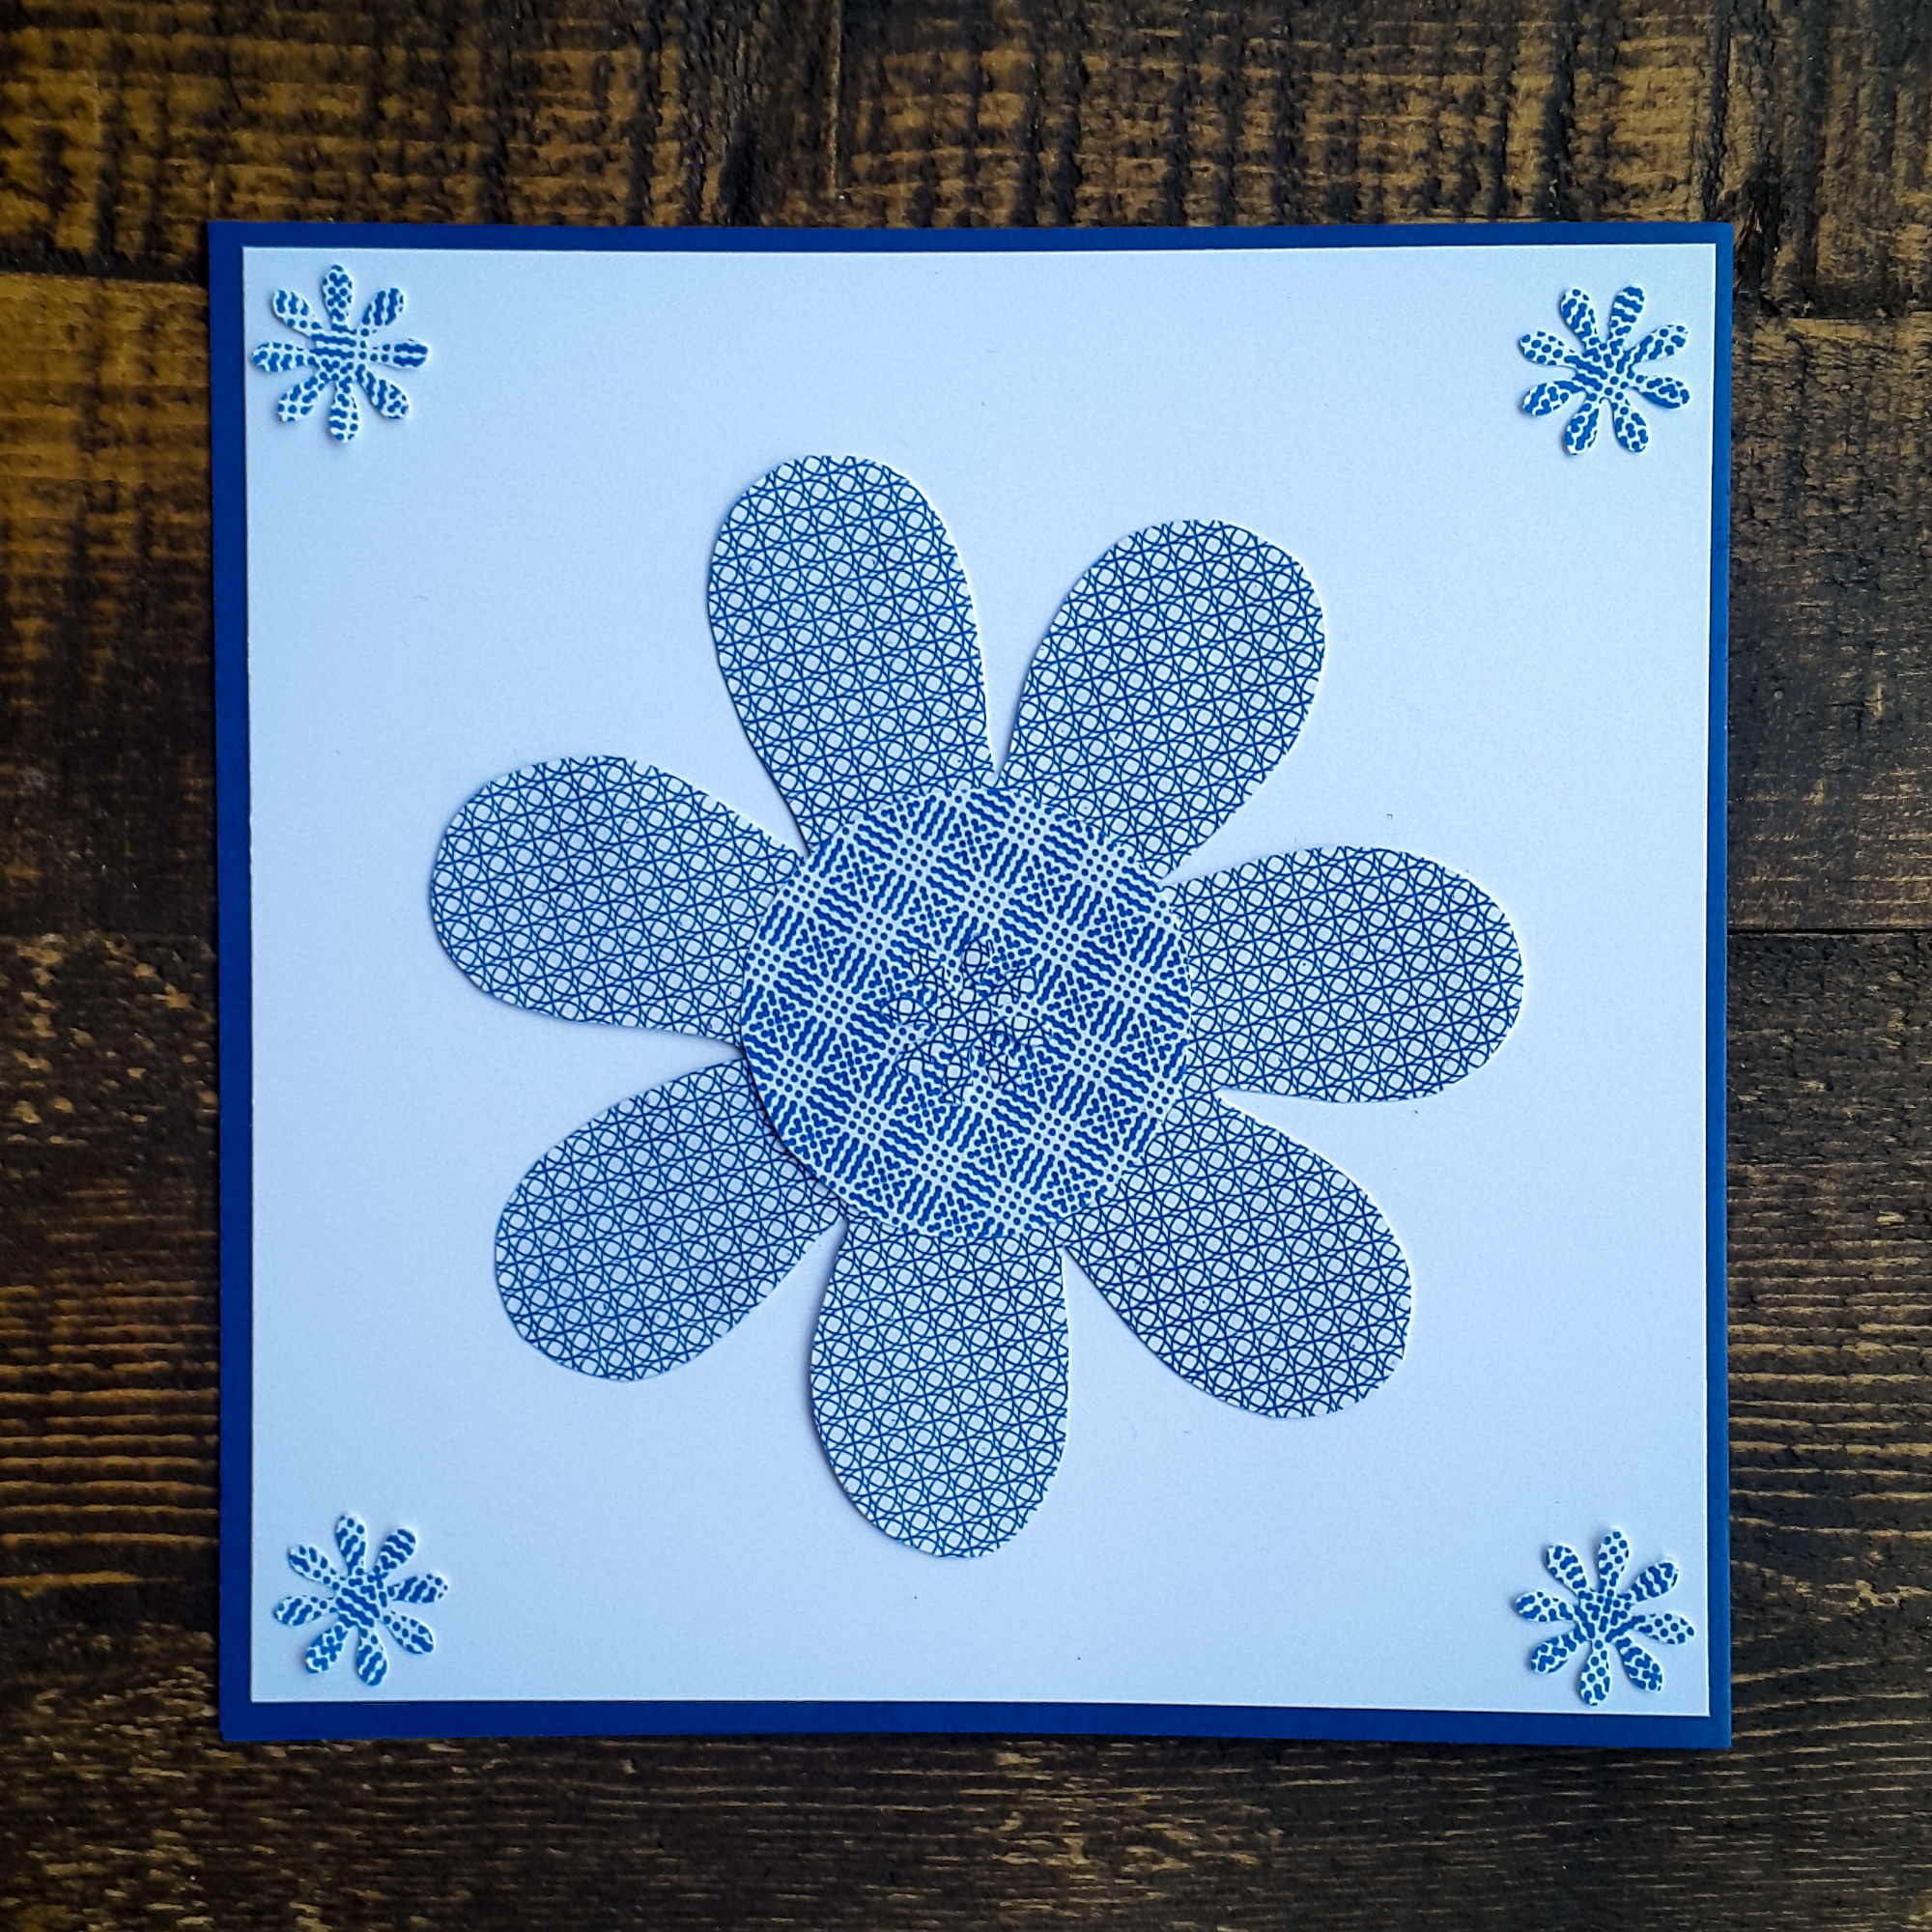
Some possible results:

Show Us What You Made
We would love to see what you came up with. Send us a picture and tell us who you made it for and why. We will select the three most unique ones and feature them on our Instagram page. Be sure to follow us (@FGGDesigns) so you can see if you’ve been featured!